Boot a USB stick, erase drives to NIST SP 800-88, and walk away with a digitally signed certificate that says exactly what was done. This guide covers unlocking your download, making the USB stick, erasing one drive or sixteen at once, and checking certificates.
1DownloadGet the ISO from the product page.
2UnlockPaste your license file once, in your browser.
3Write USBRufus, balenaEtcher, or dd.
4Boot and eraseNo key prompts, ever again.
Version 0.3.1 · September 2026 New in 0.3.x: hidden areas (HPA and DCO) removed before erasing, up to sixteen drives at once, the product logo on certificates. Earlier in 0.2.x: signed PDF certificates, SATA unfreeze, hardware report, one folder per drive when saving.
01What you need
Your license file, license.key, which arrives by email after purchase. It holds two lines: your license key (starts with PPSAN1-) and the key that digitally signs your certificates (starts with PPSCK1-). Keep the whole file.
A USB stick for booting, 64 MB or larger. It will be completely overwritten.
A second USB stick for certificates, formatted FAT32 or exFAT (the way Windows and macOS normally format sticks). The tool runs from memory and cannot save onto the boot stick.
The computer whose drives you are erasing: any 64 bit Intel or AMD PC or laptop, UEFI or legacy BIOS. Apple Silicon Macs are not supported.
02Download the ISO
Download ppsanitize-0.3.1.iso from the PowerPack Sanitizer product page. The download is locked: it boots, but it will not touch a drive until a license is added. The unlock page checks the file's SHA-256 checksum for you. To check it yourself:
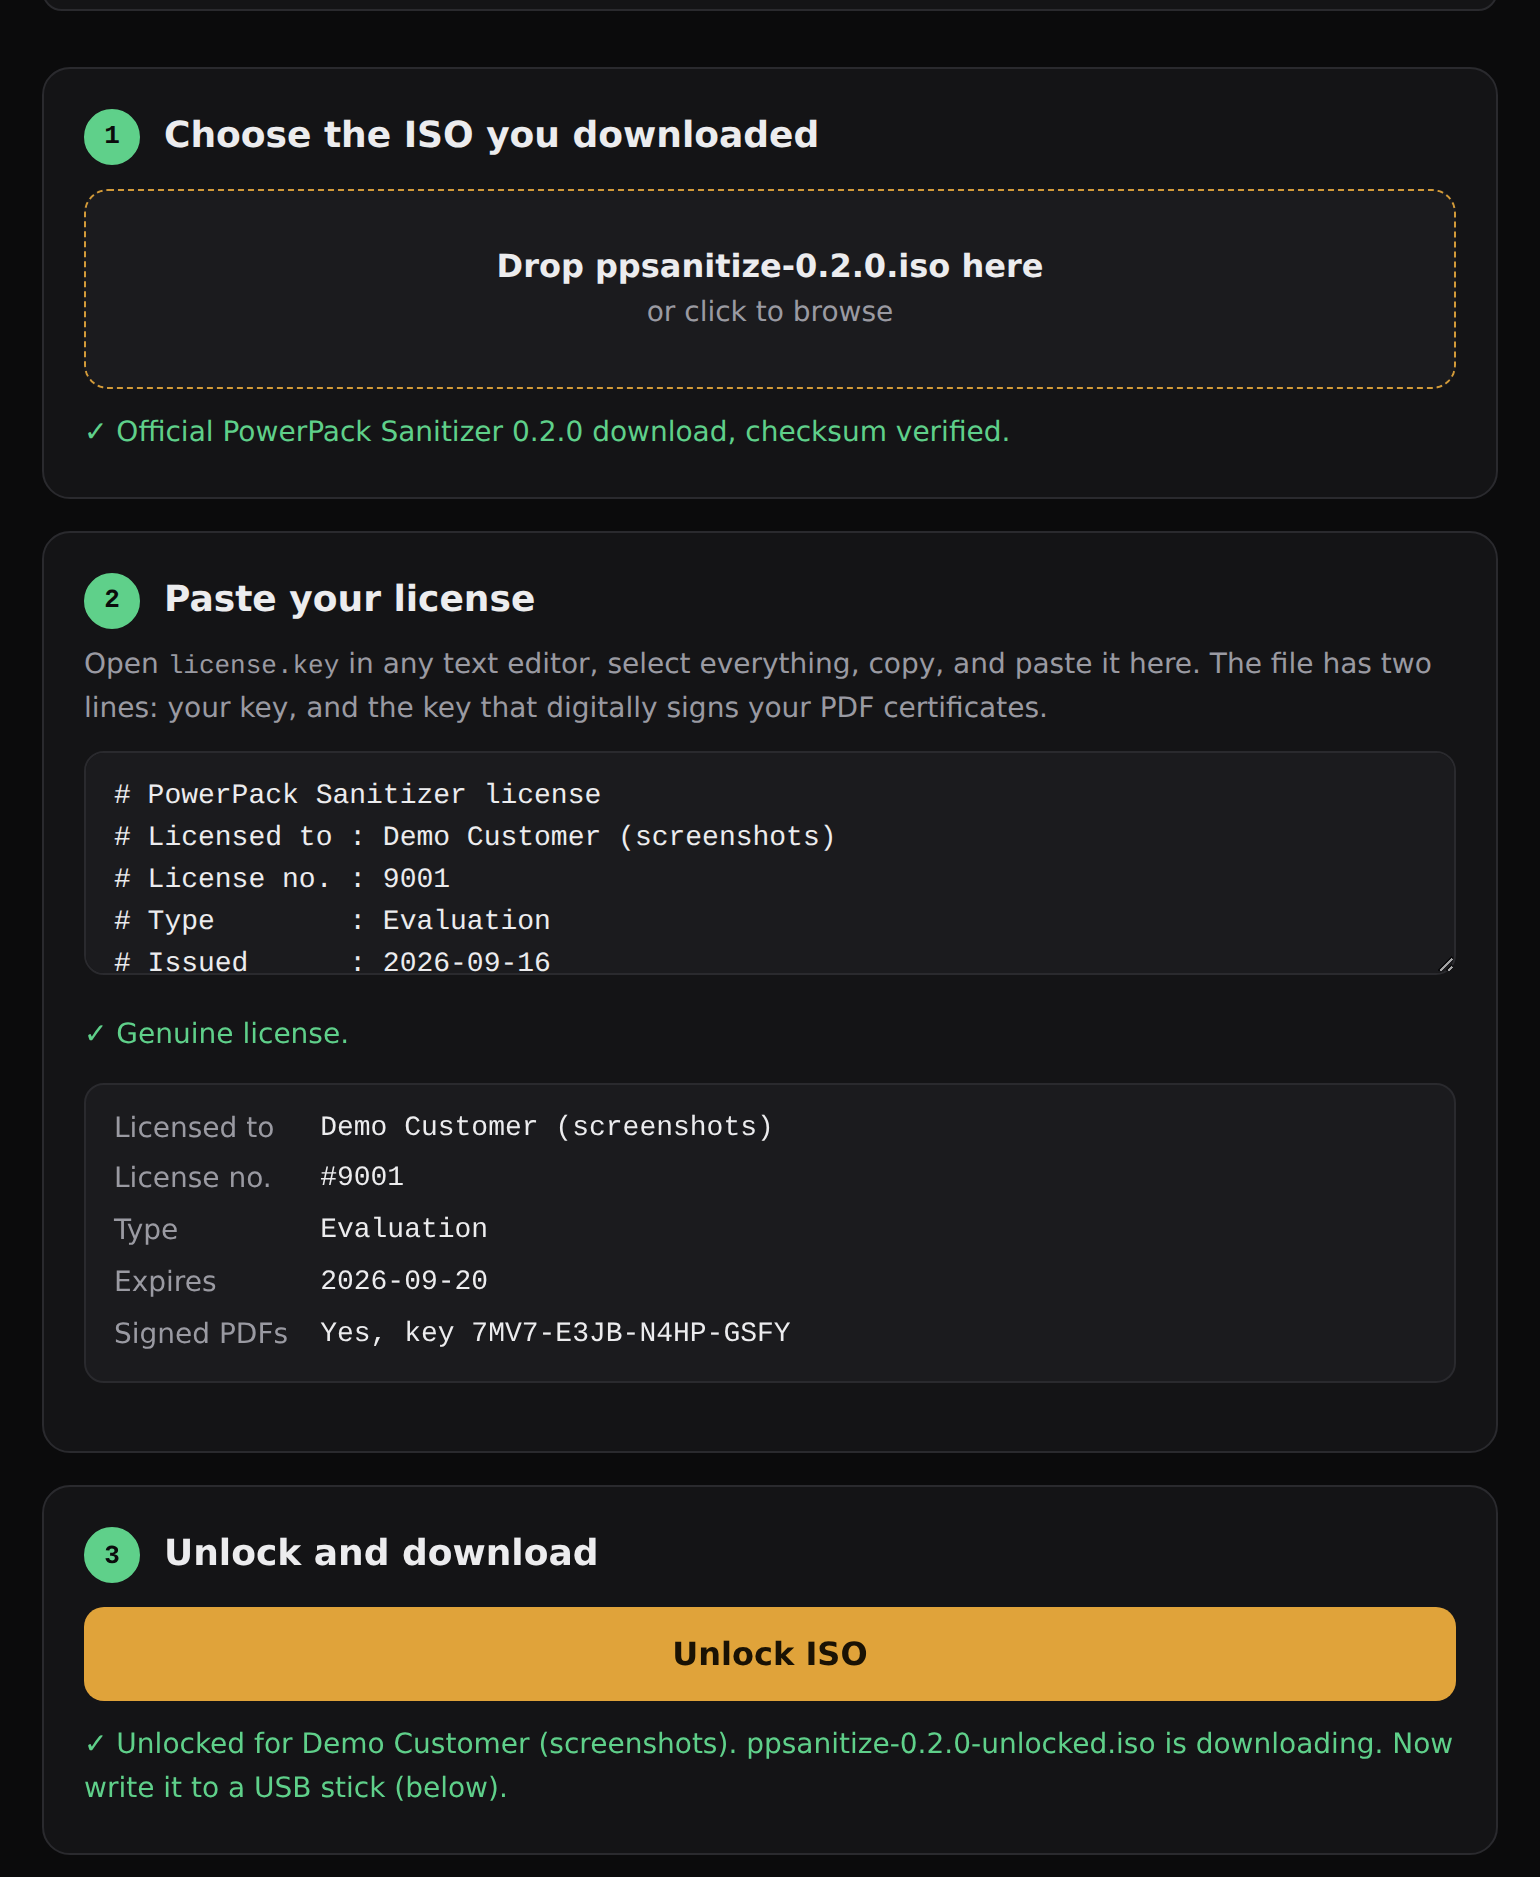
Open the Unlock page linked from the product page. Everything happens inside your browser: the ISO and your license are never uploaded.
Choose the ISO. Drag ppsanitize-0.3.1.iso onto the box. A green line confirms it is the official download.
Paste your license. Open license.key in any text editor (Notepad, TextEdit), select everything, copy, and paste. The page checks it immediately and shows who it is licensed to. Signed PDFs: Yes means both lines were pasted.
Click Unlock ISO. Your browser downloads ppsanitize-0.3.1-unlocked.iso.
A valid ISO and license. The license shown is a demonstration license and has been revoked.
If you paste only the PPSAN1- key, the ISO still unlocks, but PDF certificates from that stick will not be digitally signed. The page warns you when that happens.
The unlocked ISO carries your licensee name, shown on screen every time the tool starts. Treat it like the license itself. You can unlock the same download again at any time to make more sticks.
If the license is rejected
Message
What to do
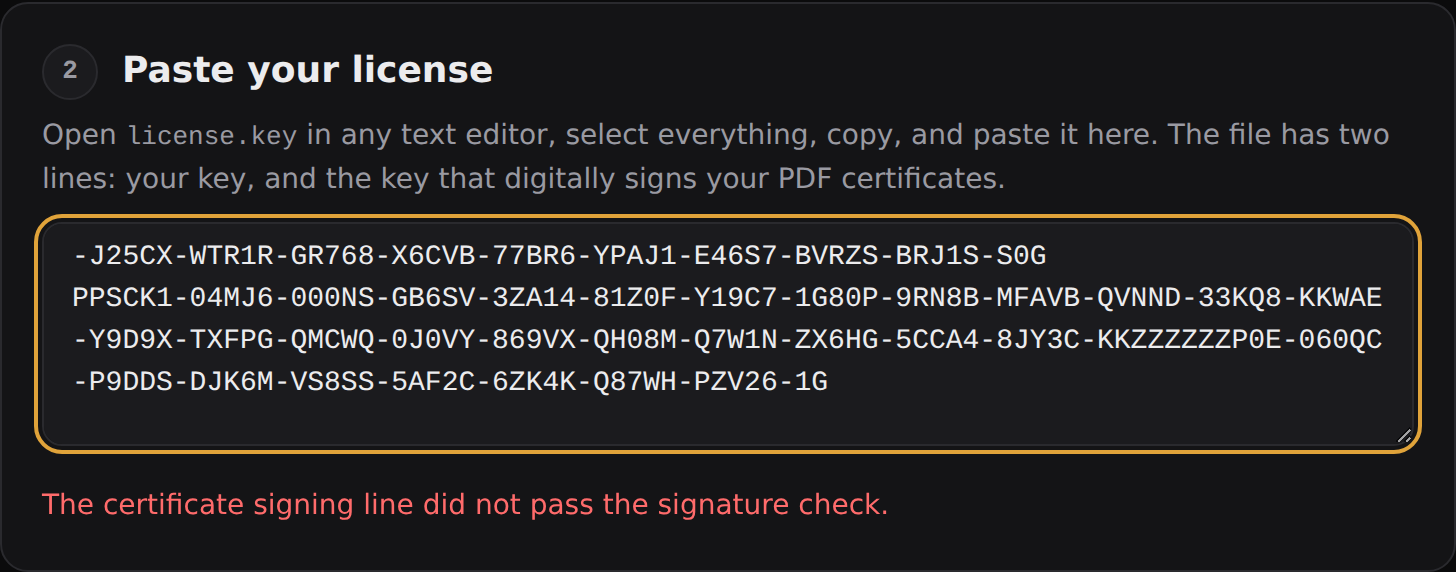
did not pass the signature check
A character is wrong. Copy the file contents again rather than retyping.
incomplete
Part of a line was cut off. Copy the whole file again.
expired
Evaluation licenses have an end date. Buy a full license to continue.
revoked
This license was cancelled (refund or reported leak). Contact the seller.
not a PowerPack Sanitizer ISO
You selected a different file. Choose the .iso you downloaded.
04Write the unlocked ISO to a USB stick
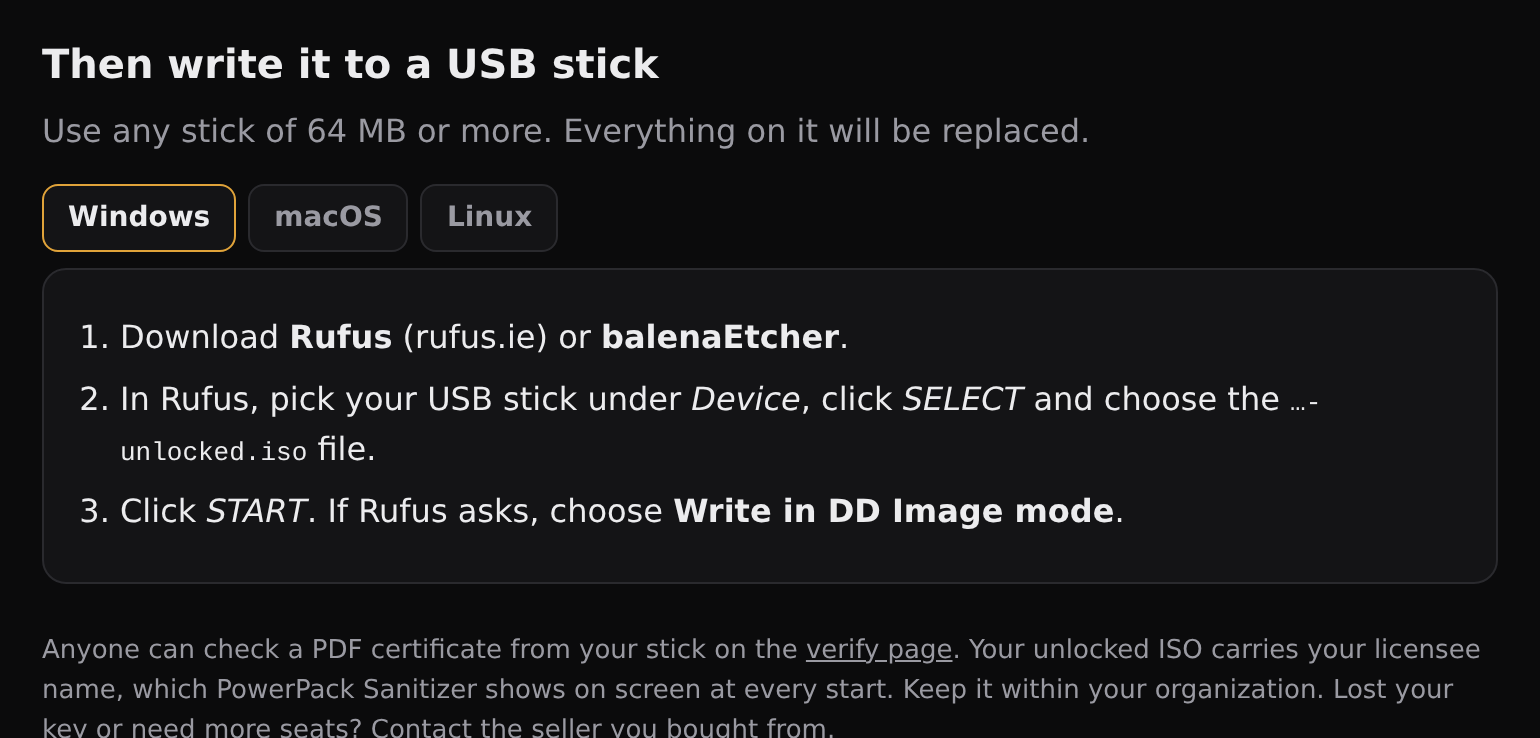
Windows
Download Rufus (rufus.ie) or balenaEtcher.
In Rufus, select the stick under Device, click SELECT and pick ppsanitize-0.3.1-unlocked.iso.
Click START. If Rufus asks how to write the image, choose DD Image mode.
macOS
balenaEtcher is the easiest route. In Terminal instead, find the stick's disk number with diskutil list, then (replacing N):
If macOS then says the disk is not readable, click Eject. That is expected. Use $HOME in the command, not the tilde shortcut.
Linux
lsblk                                  # find the stick, e.g. /dev/sdX
sudo dd if=ppsanitize-0.3.1-unlocked.iso of=/dev/sdX bs=4M conv=fsync status=progress
Check the device name twice. Writing to the wrong disk destroys it.
05Boot the computer you are erasing
Plug in the boot stick and power on. Open the one time boot menu: usually F12 (Dell, Lenovo), F9 (HP), F11 or Esc on others. Intel Macs: hold Option.
Pick the USB stick. The first menu entry starts automatically after five seconds.
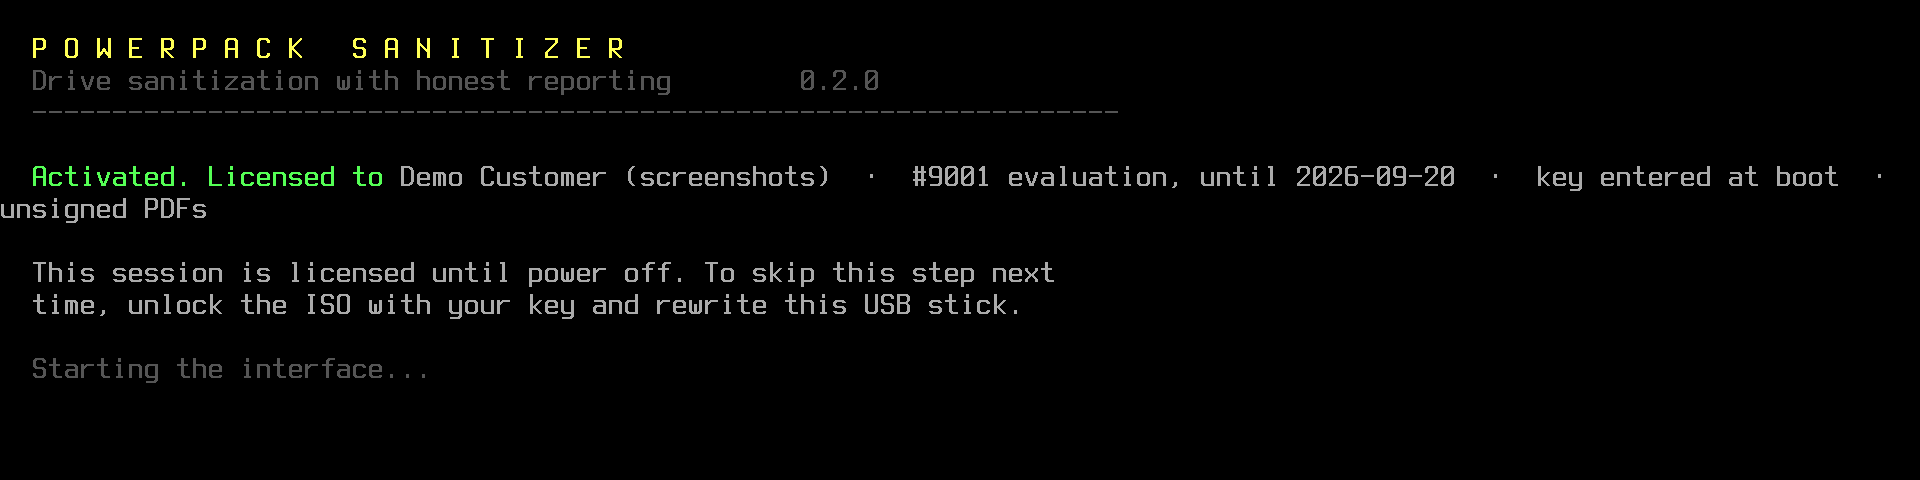
After about half a minute the tool confirms your license and opens. There is nothing to type.
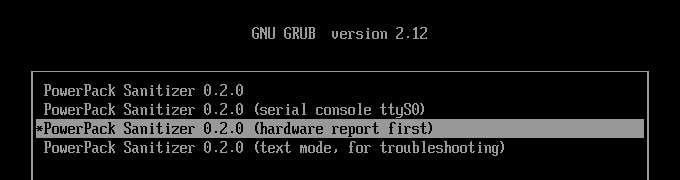
The boot menu. The third entry runs a read-only hardware report first (section 10).An unlocked stick shows who it is licensed to and whether certificates will be signed, then opens the interface.
If the computer will not boot the stick, turn off Secure Boot in the firmware setup. If the screen stays blank or garbled, choose the last menu entry, text mode, for troubleshooting.
06Sanitize one drive
Use ↑↓ to move, Enter to continue and Esc to go back. Nothing is written until the very last step.
Choose the drive
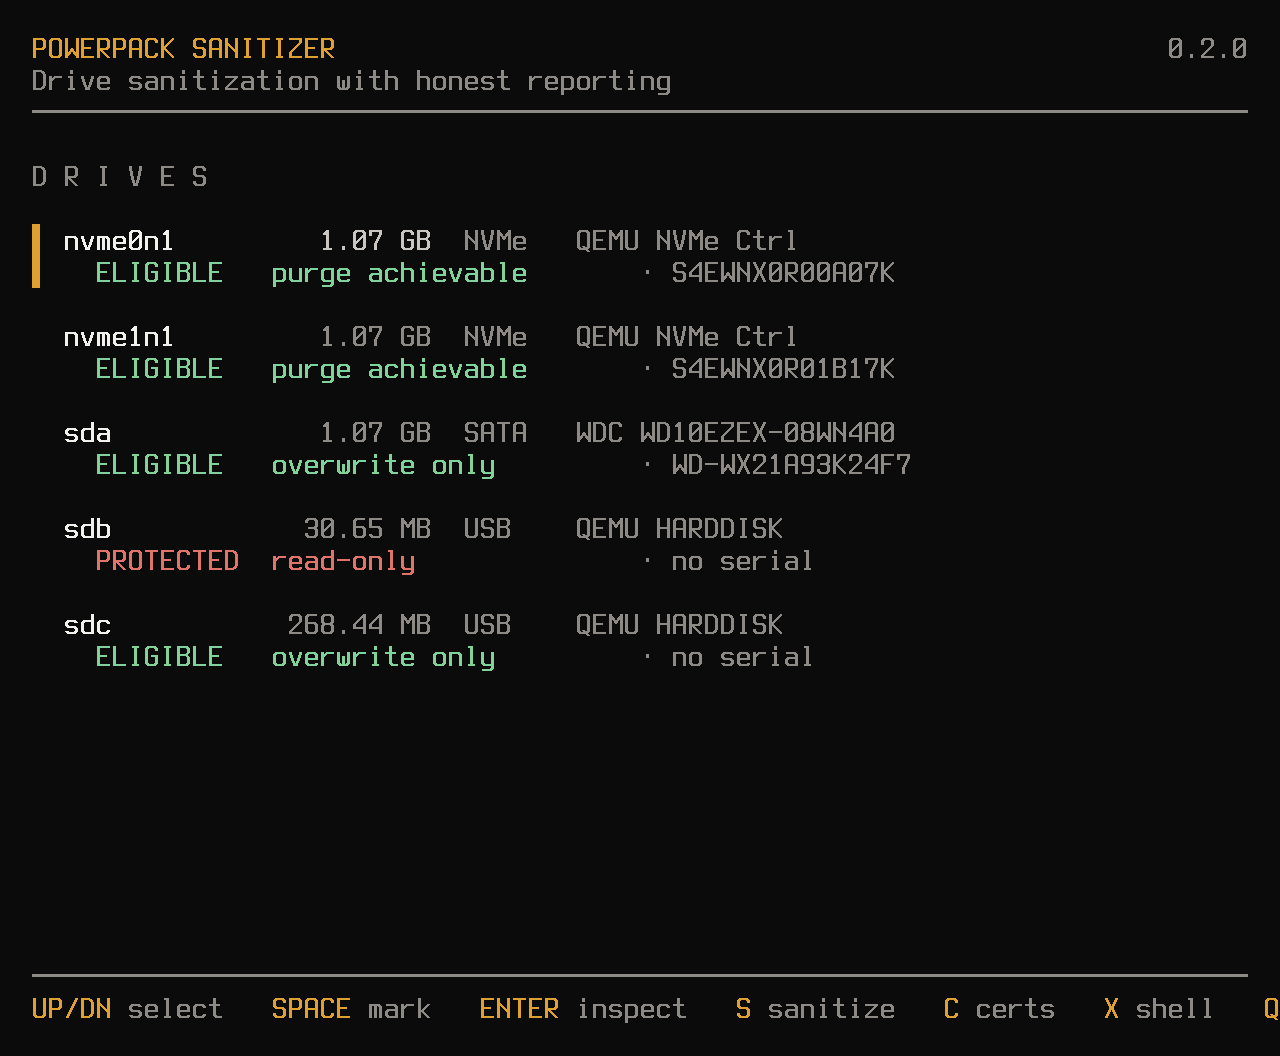
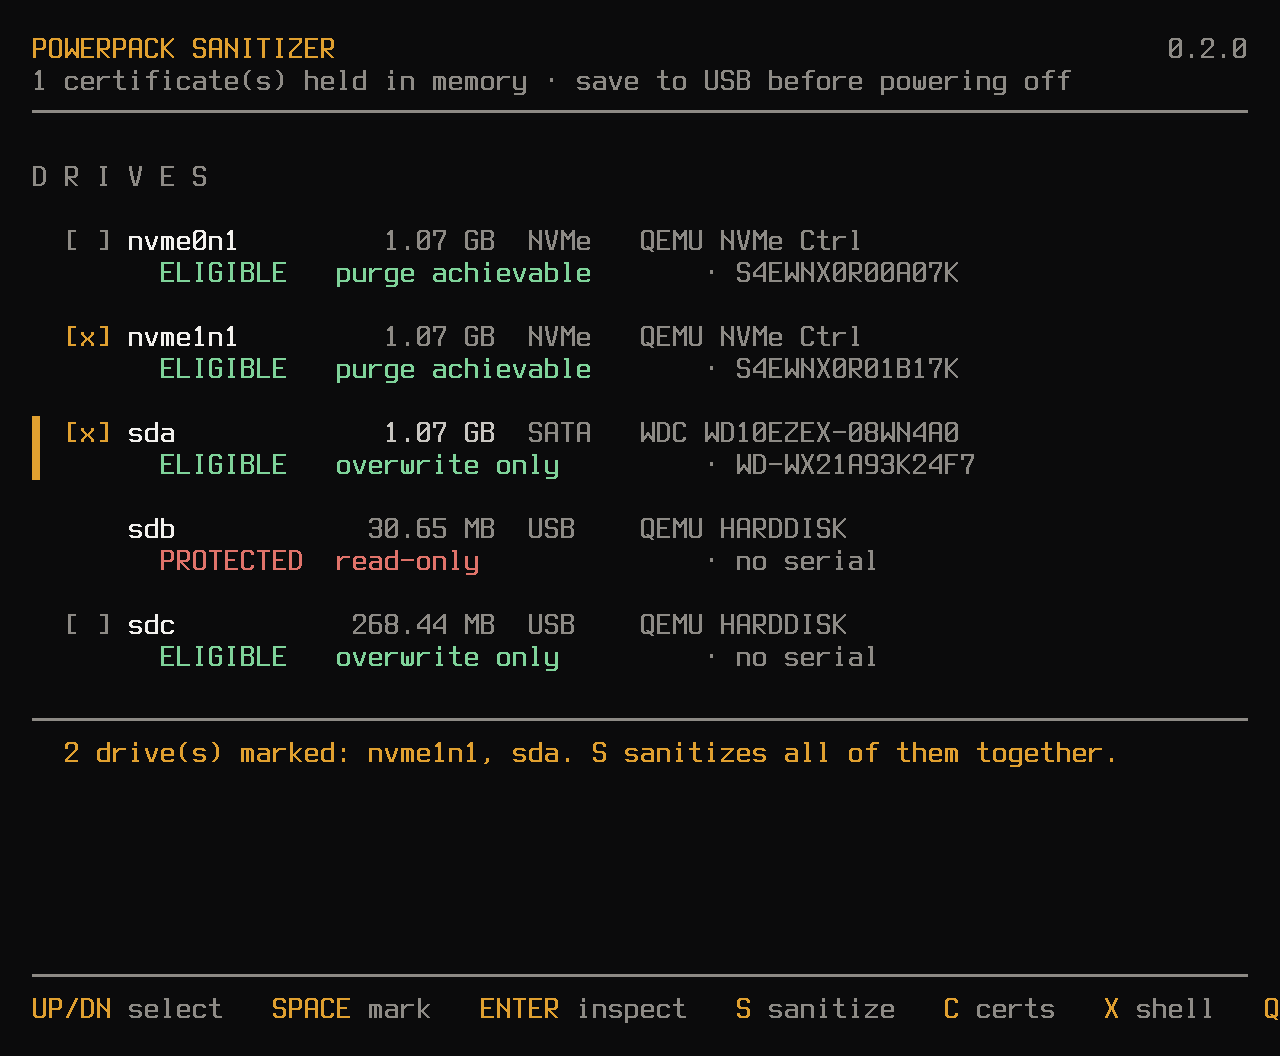
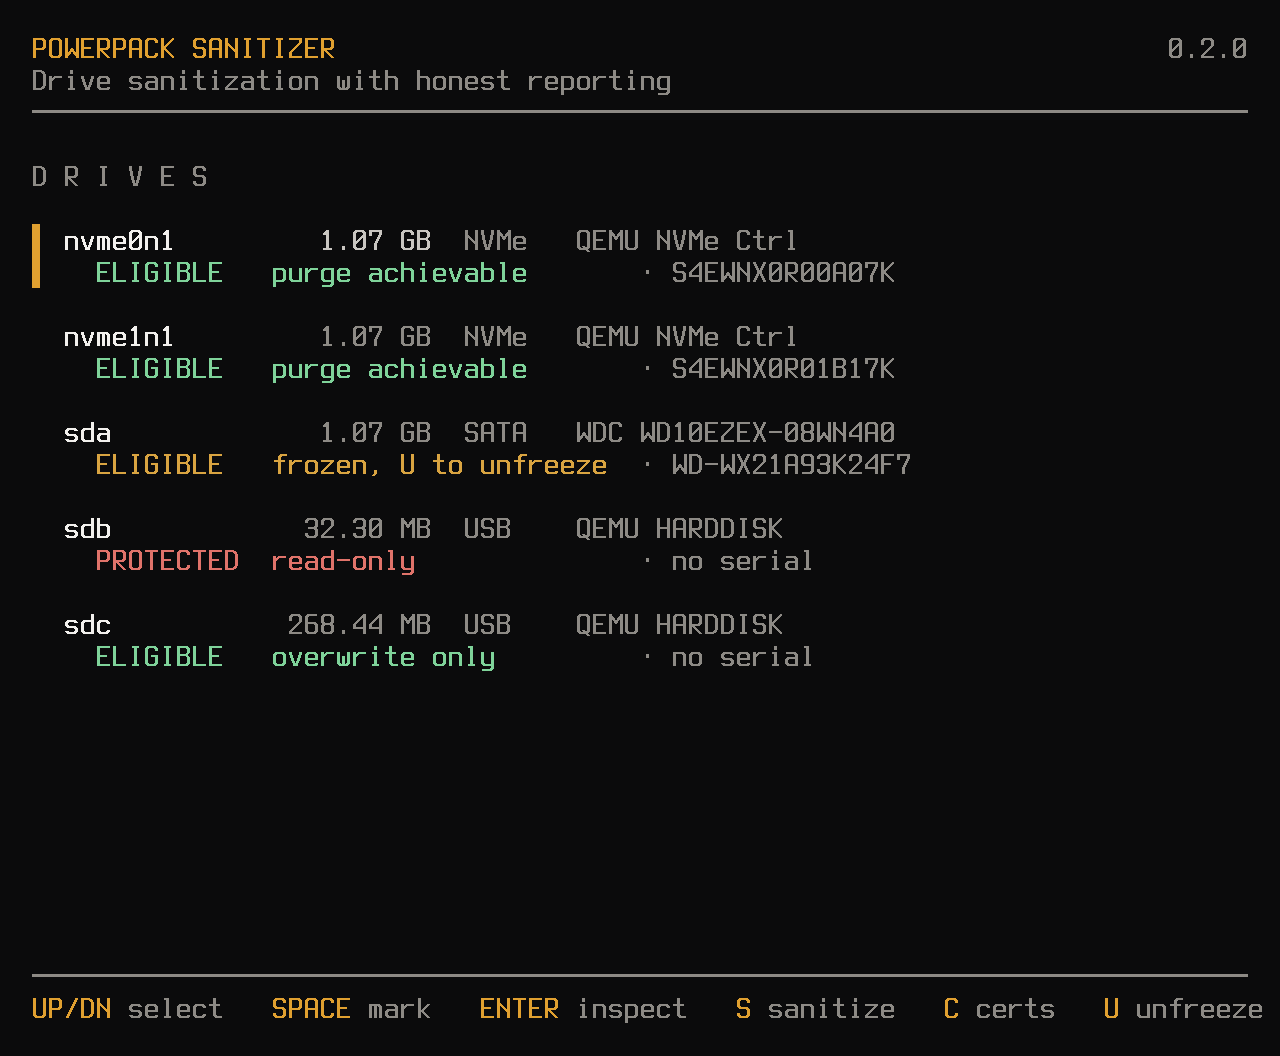
ELIGIBLE drives can be erased; the green note says the best result possible (purge achievable means the drive supports a hardware erase). The boot stick is always PROTECTED.
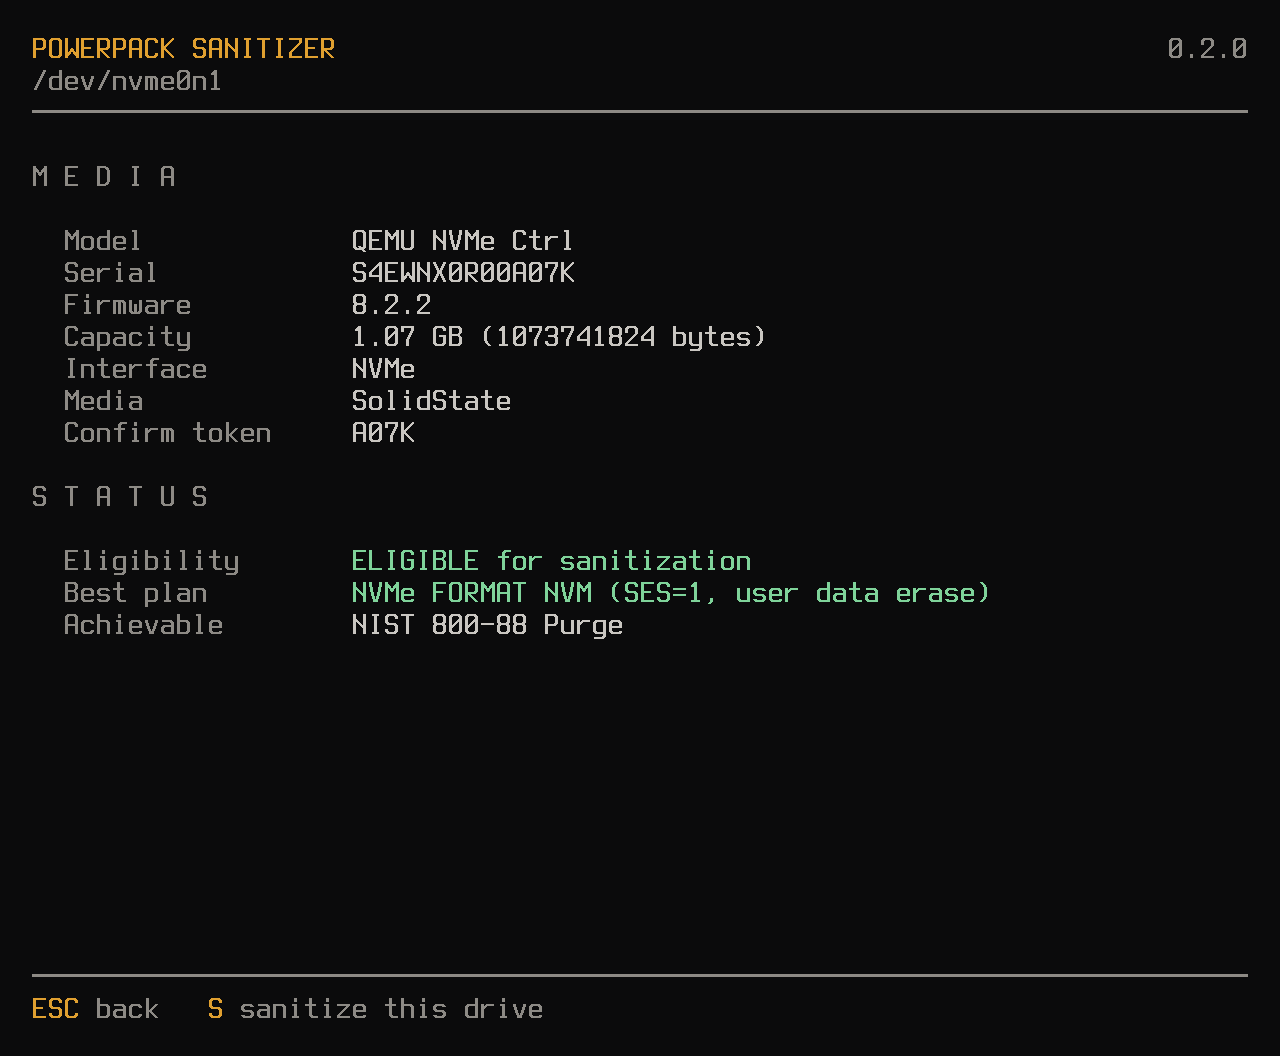
Press Enter to inspect a drive, then S to sanitize it.
Record details
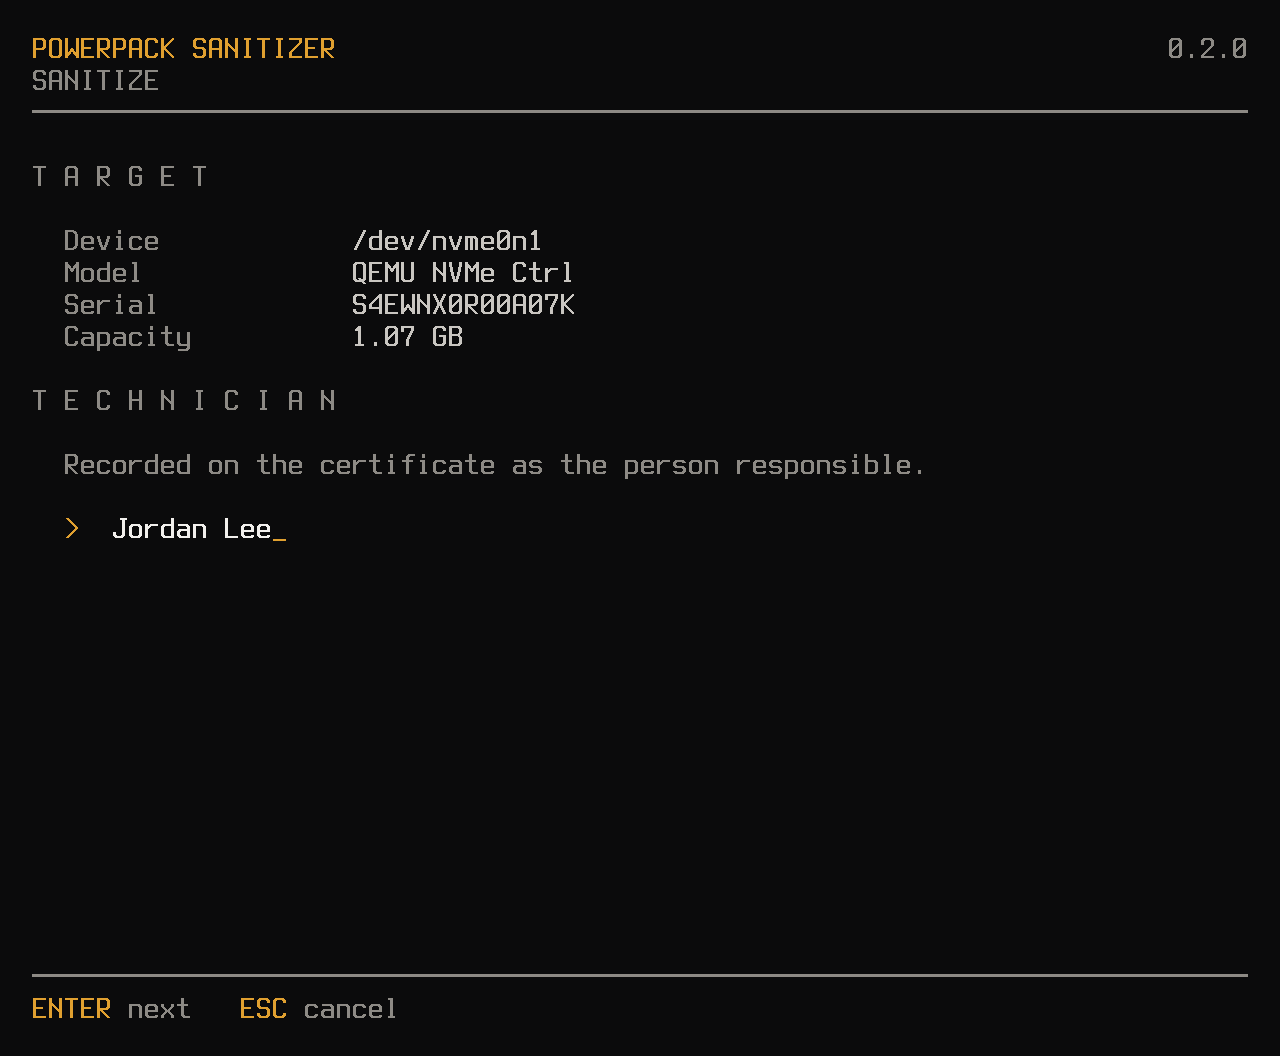
Enter the technician name (required), then the optional organization, asset tag and work order. They are printed on the certificate.
Method and verification
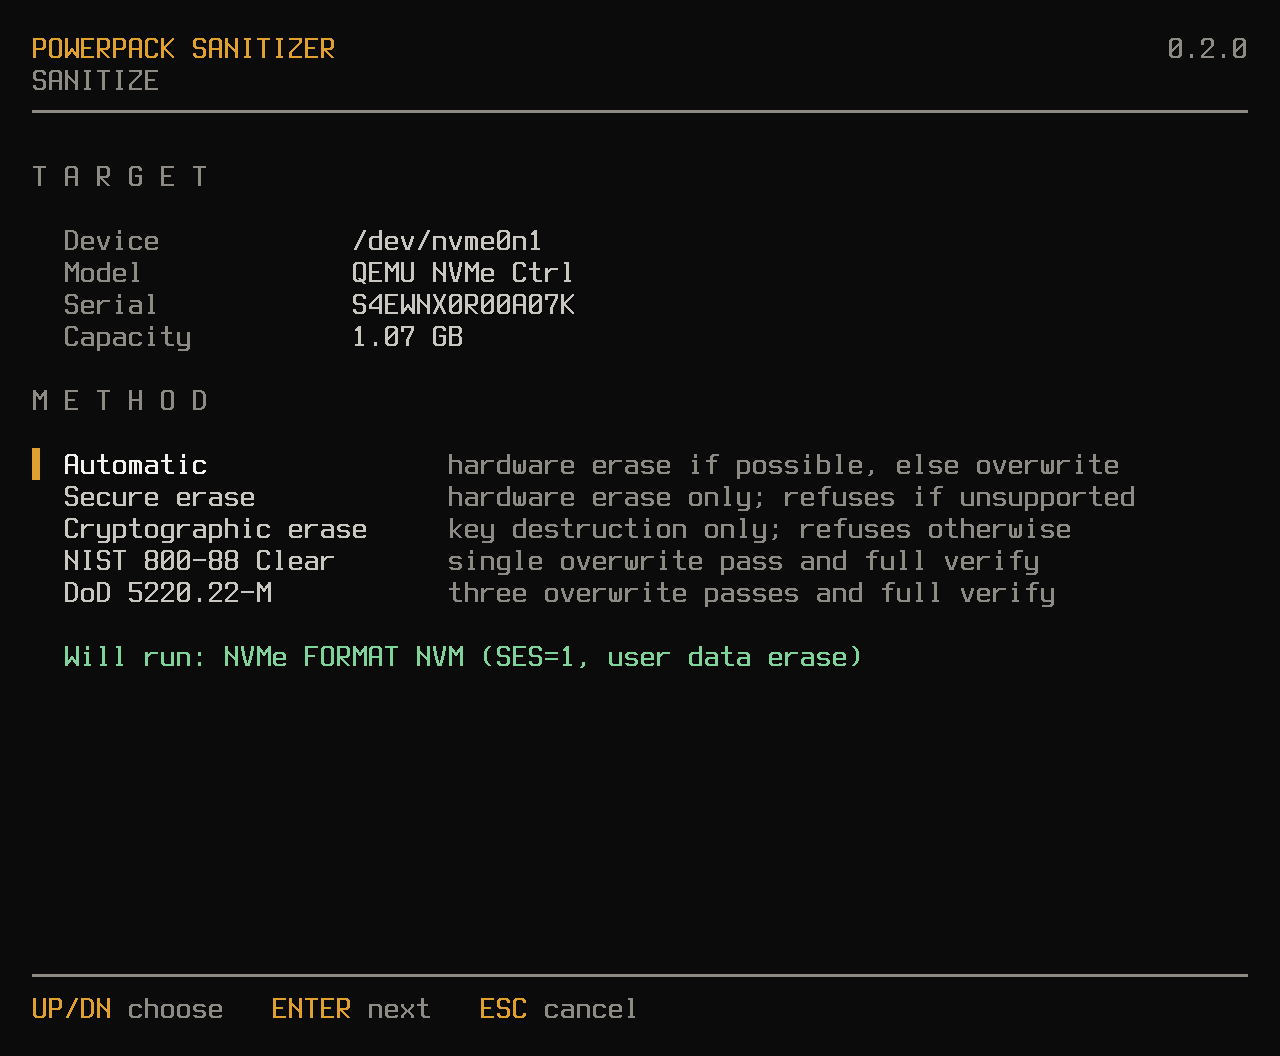
Method
Use it when
Automatic (recommended)
Always, unless you have a reason not to. Uses the drive's built in secure erase when available (NIST Purge), otherwise a verified overwrite (NIST Clear).
Secure erase
Your policy requires a hardware erase. Refuses instead of falling back.
Cryptographic erase
Self encrypting drives where key destruction is acceptable.
NIST 800-88 Clear
One overwrite pass plus full verification.
DoD 5220.22-M
A contract names this method. Three passes, much slower, no stronger on modern drives.
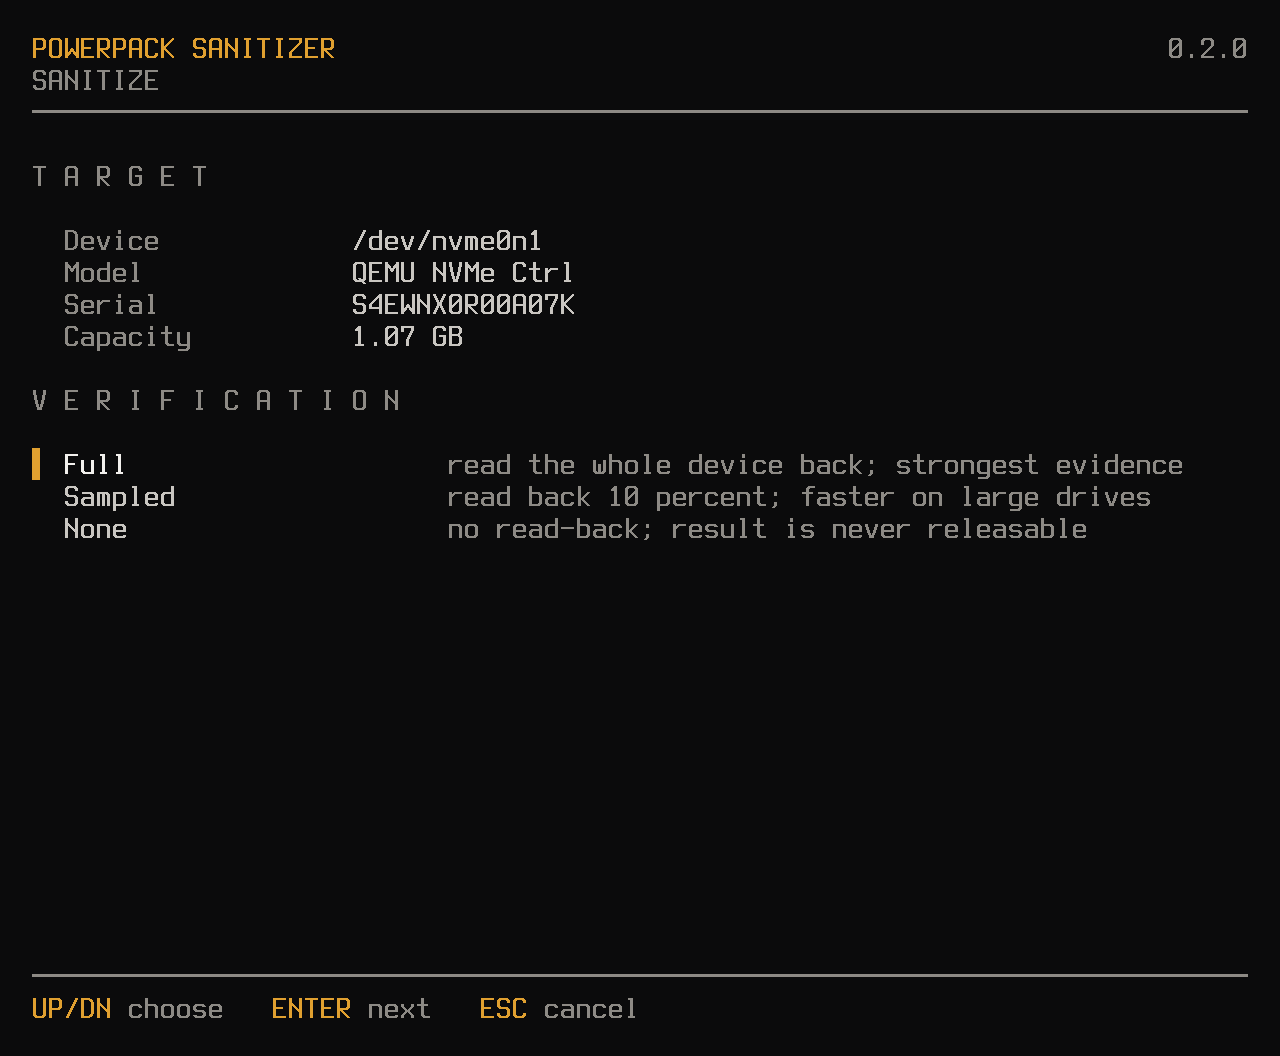
Keep verification on Full unless the drive is very large. None is never marked releasable.
Confirm
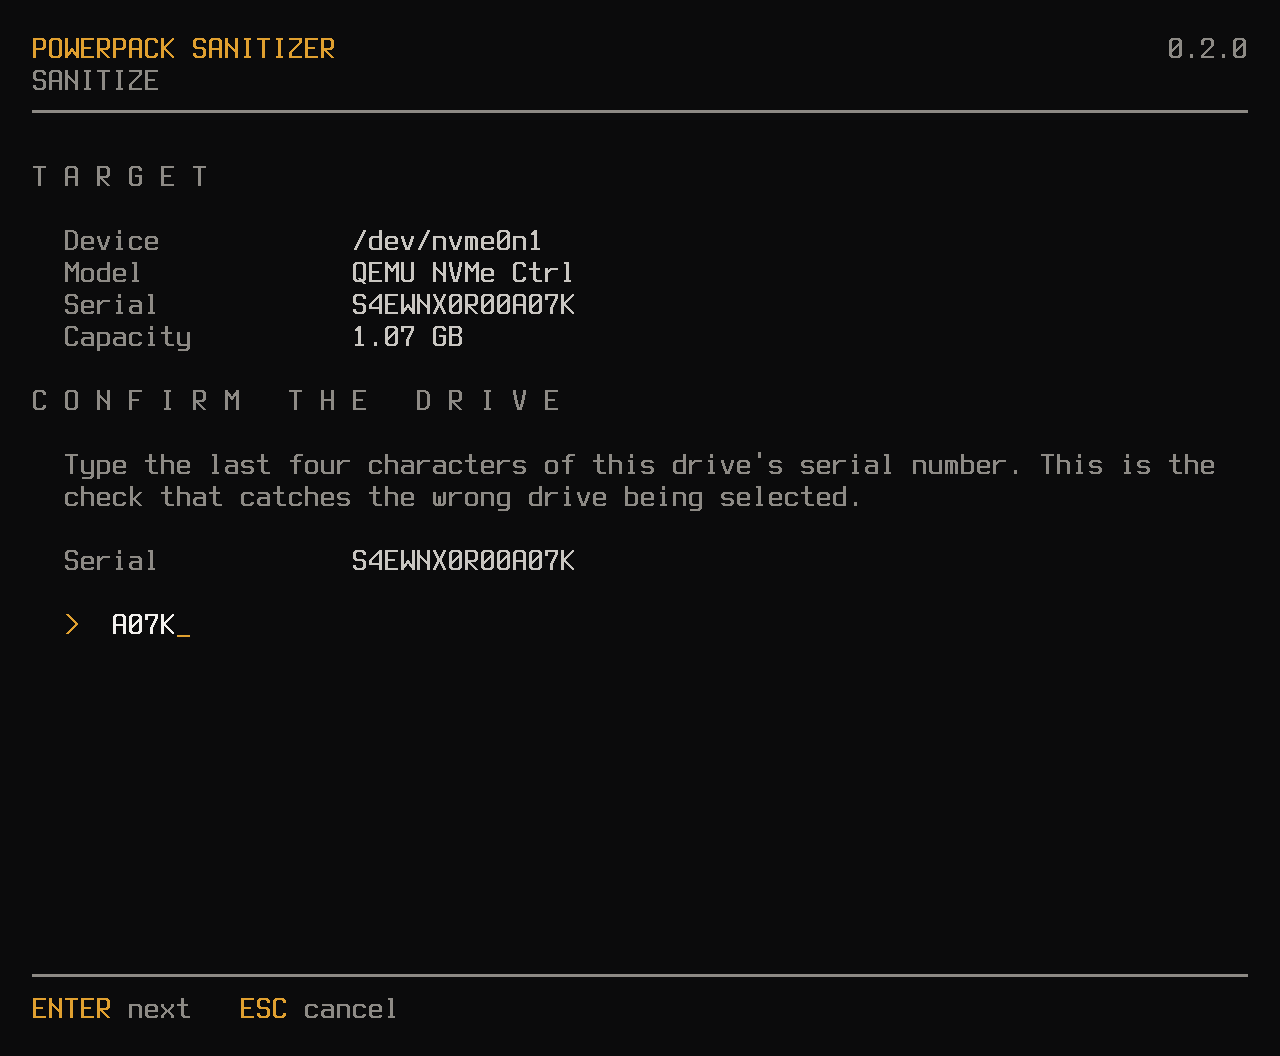
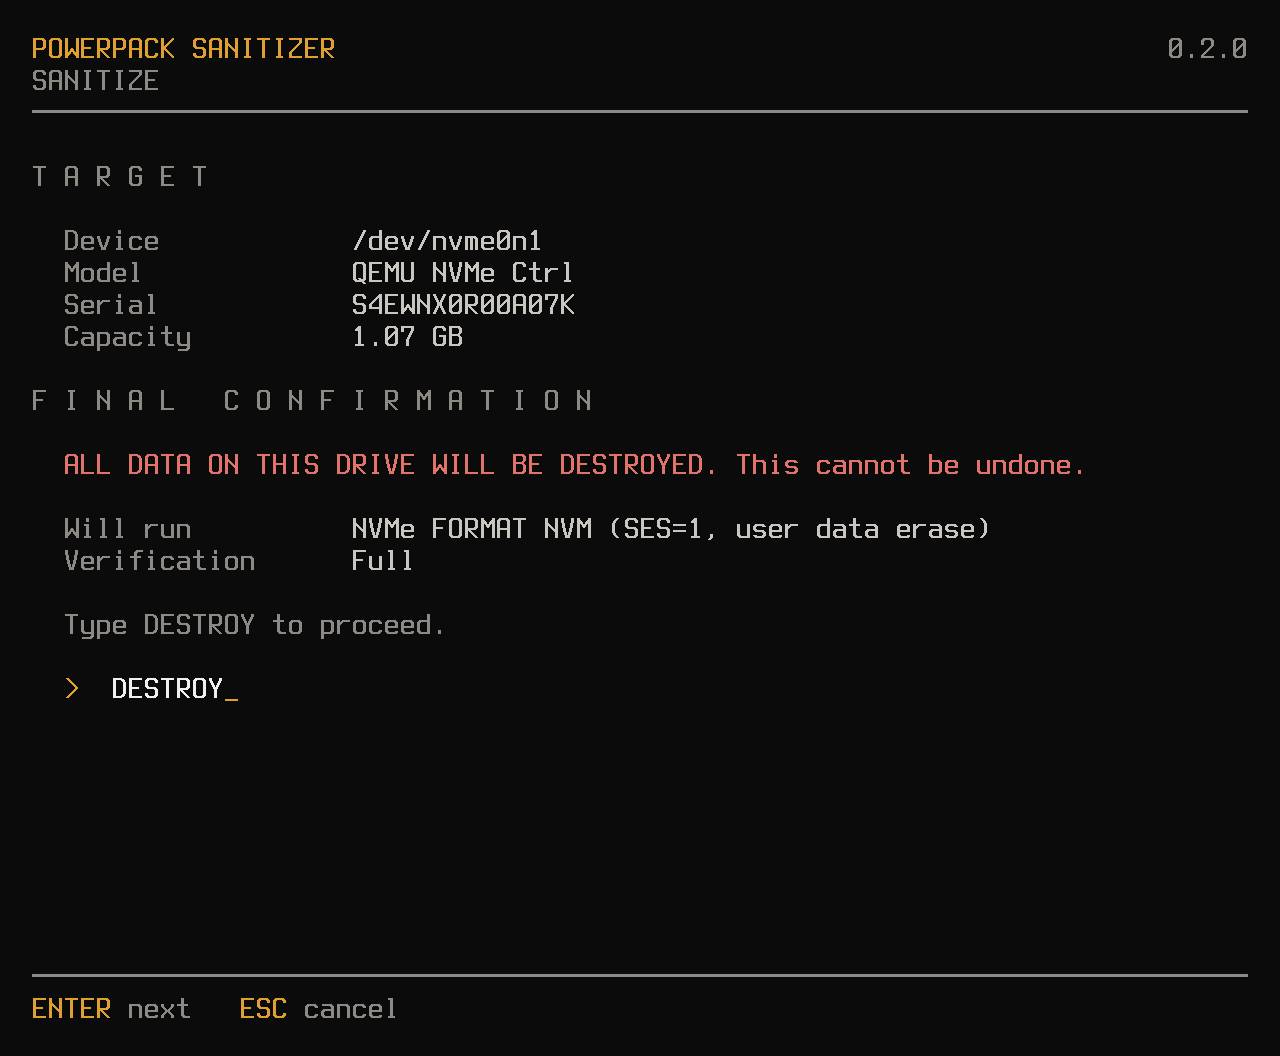
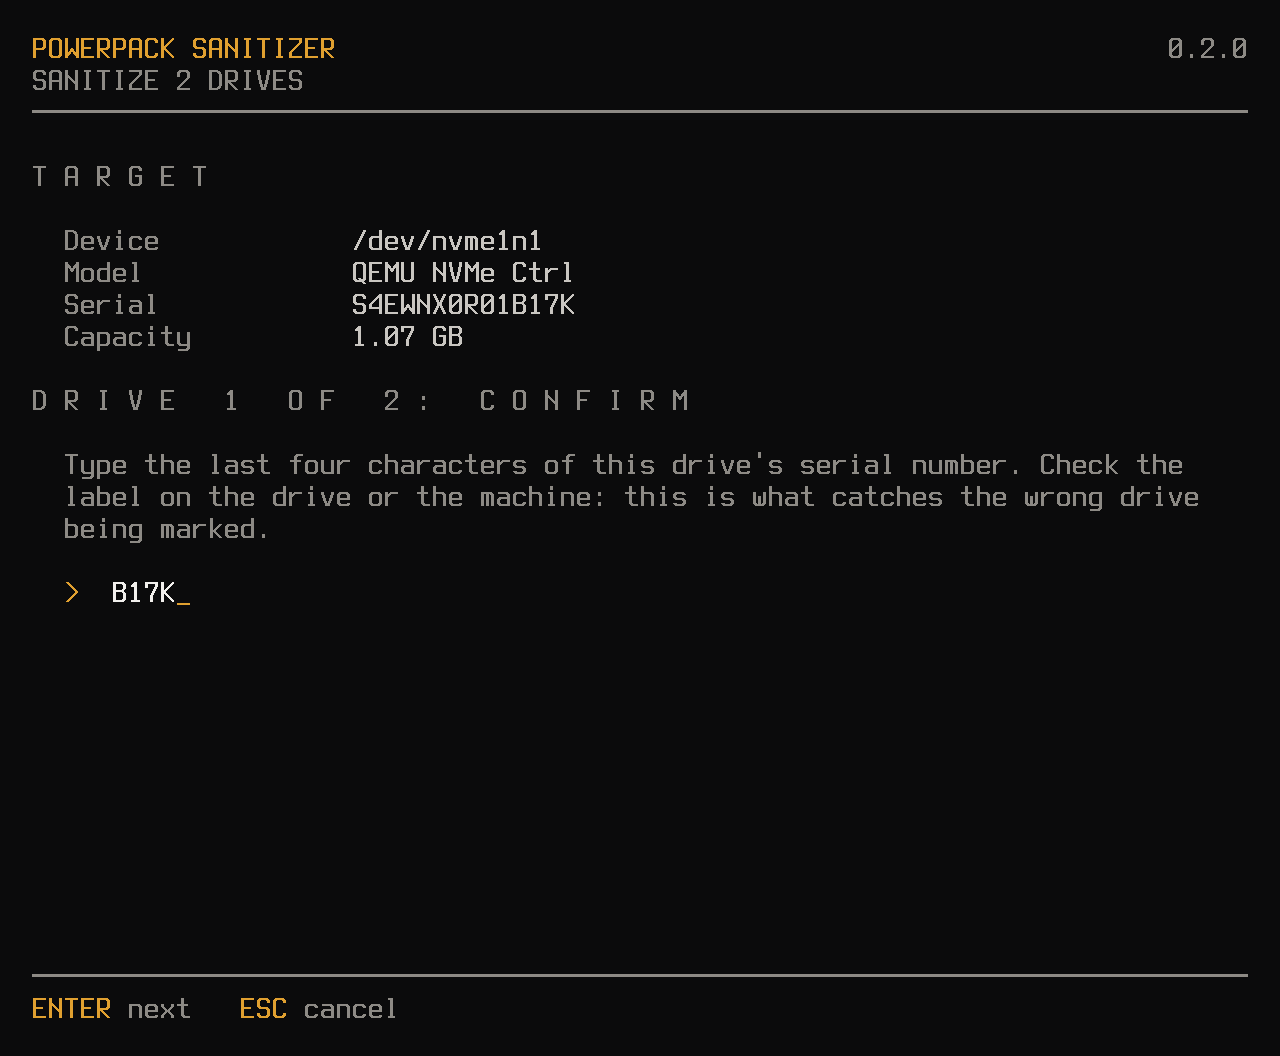
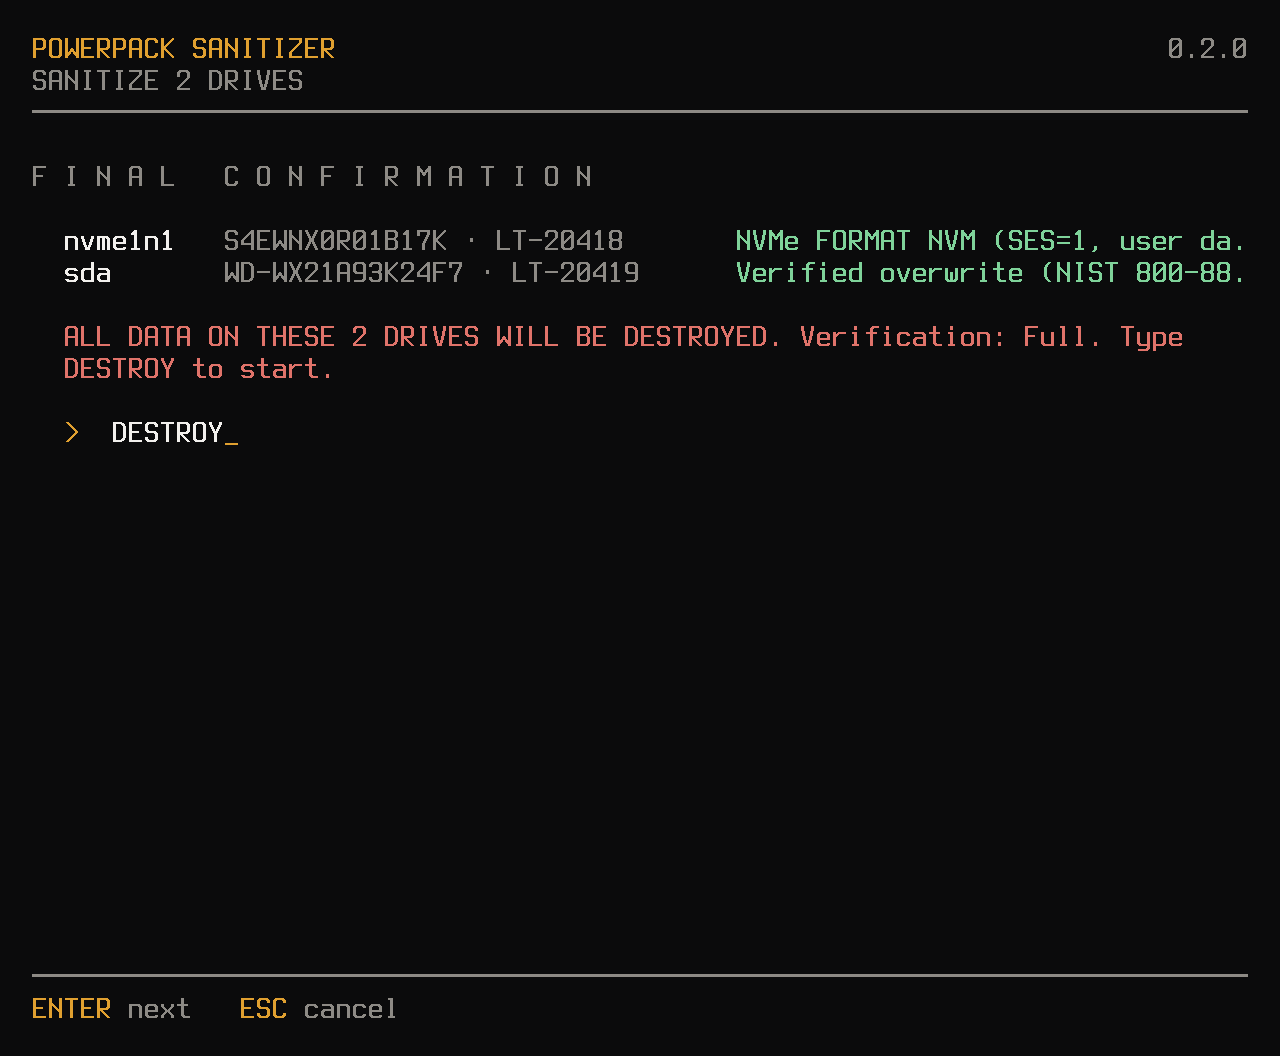
Type the last four characters of the serial. This catches the wrong drive being selected.Type DESTROY and press Enter to start.
Wait, then read the result
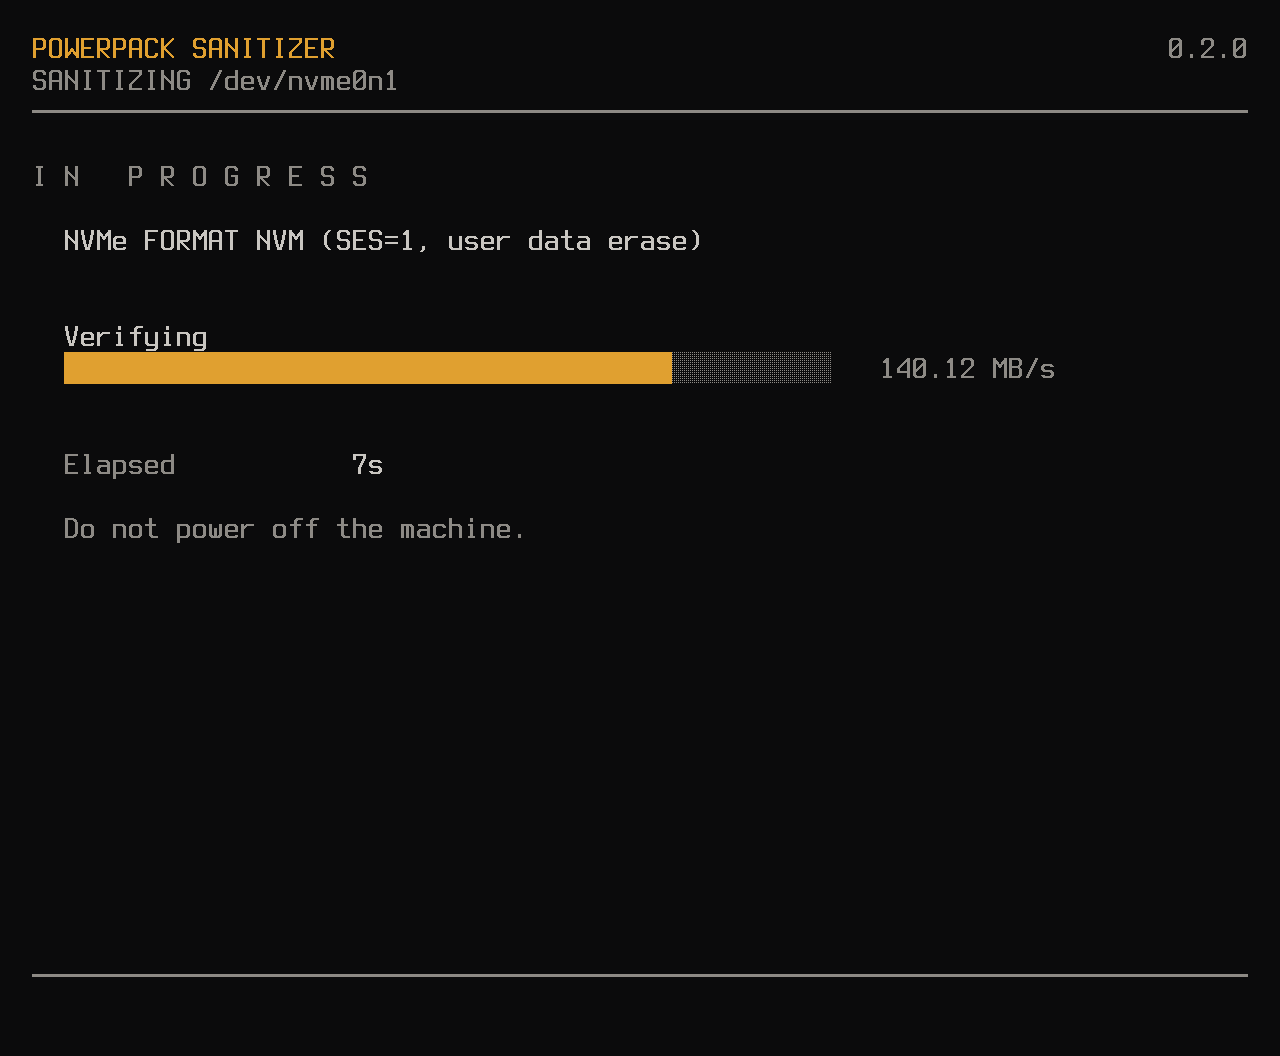
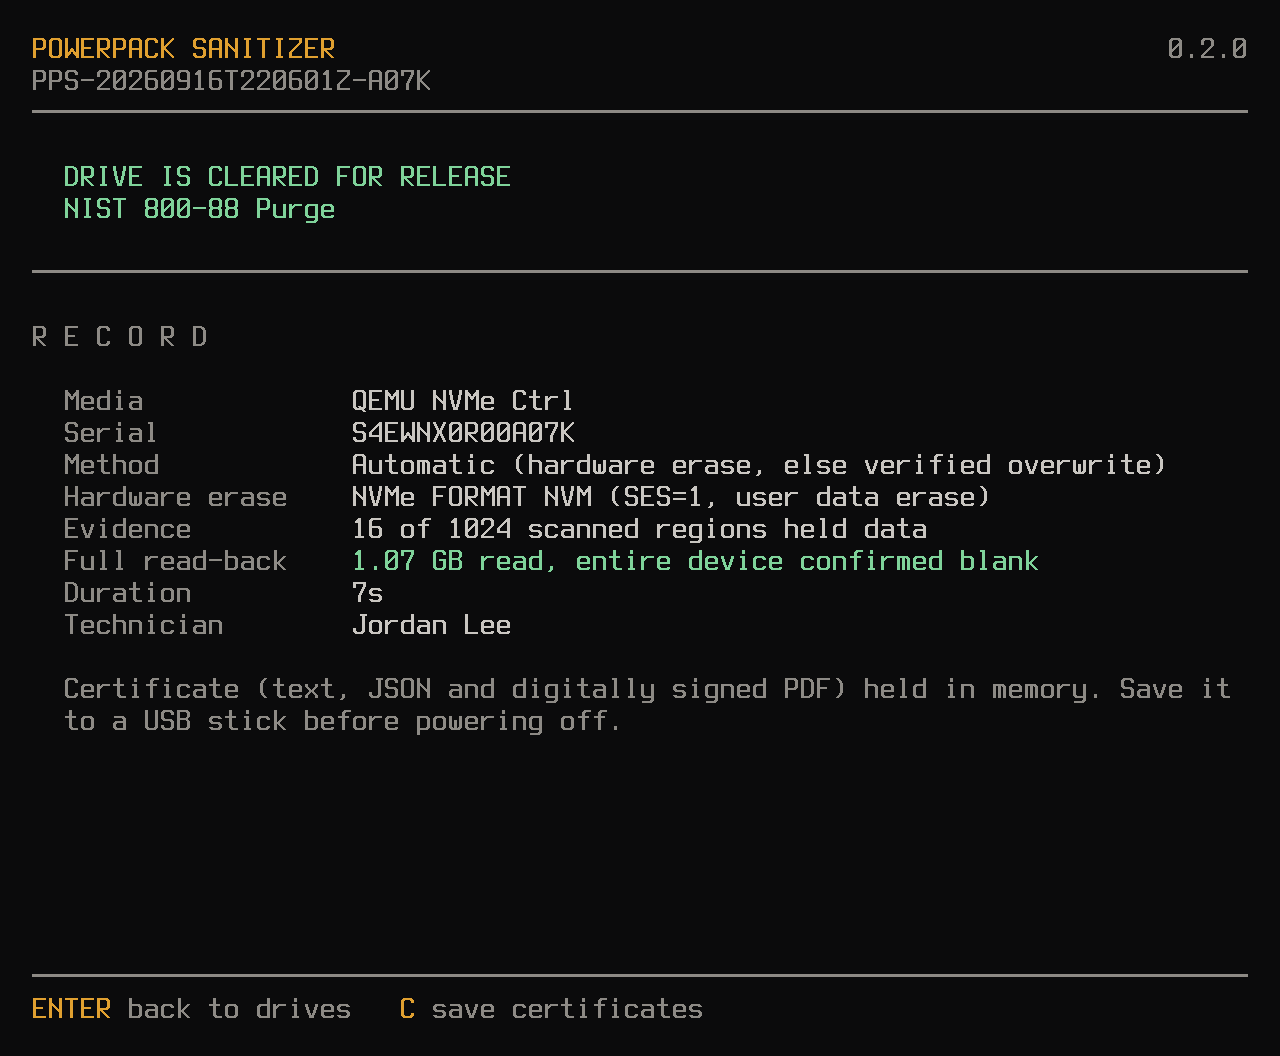
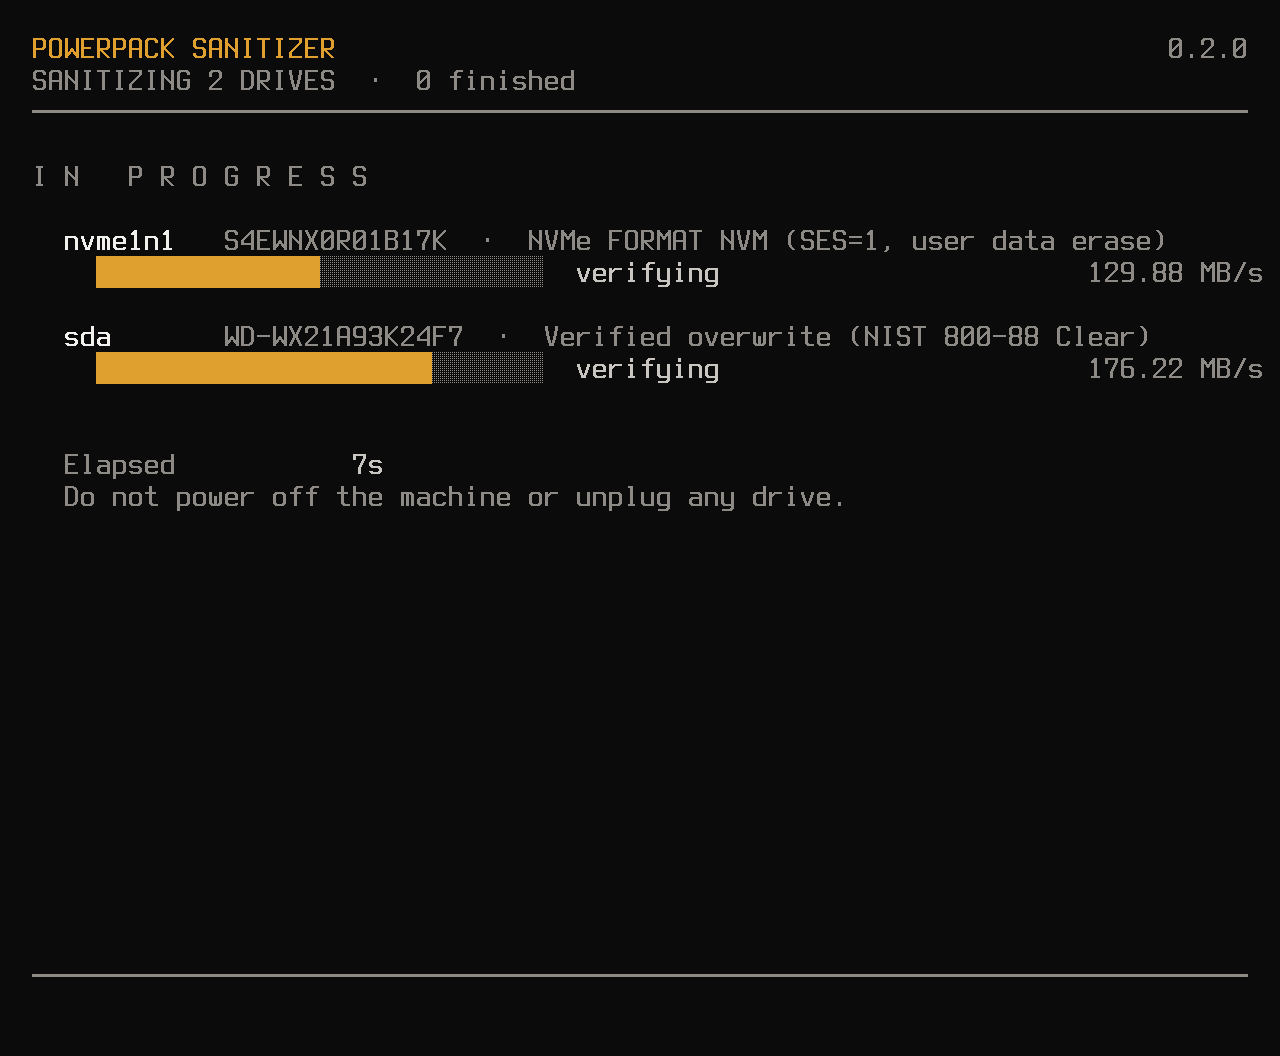
Do not power off while this screen shows.The verdict and the evidence behind it.
Verdict
Meaning
NIST 800-88 Purge
A hardware erase completed and was verified. The strongest result. Cleared for release.
NIST 800-88 Clear
A verified overwrite. Cleared for release where your policy accepts Clear. The certificate lists what an overwrite cannot reach.
Completed (UNVERIFIED)
Verification was skipped. Not releasable.
INCOMPLETE
A write failed or data survived. Data may remain. Retry, or destroy the drive physically.
07Sanitize several drives at onceNEW
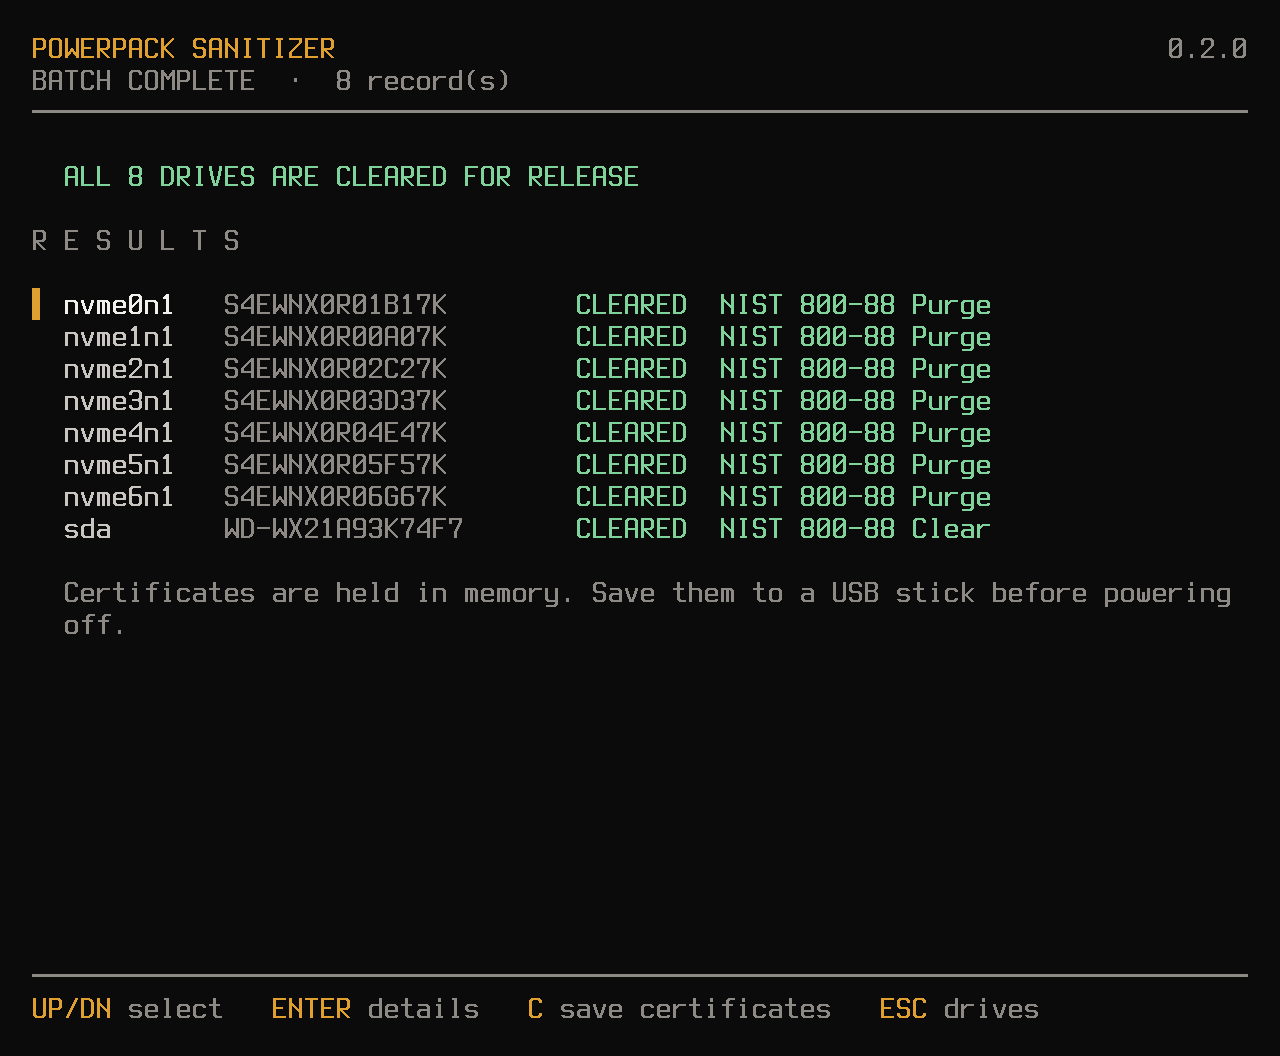
Up to sixteen drives can run together, for example a bench dock full of drives. Each drive still gets its own confirmation and its own certificate. Beyond eight drives the progress screen shows one line per drive so they all stay visible.
On the drive list, move to each drive and press Space to mark it. Protected drives cannot be marked.
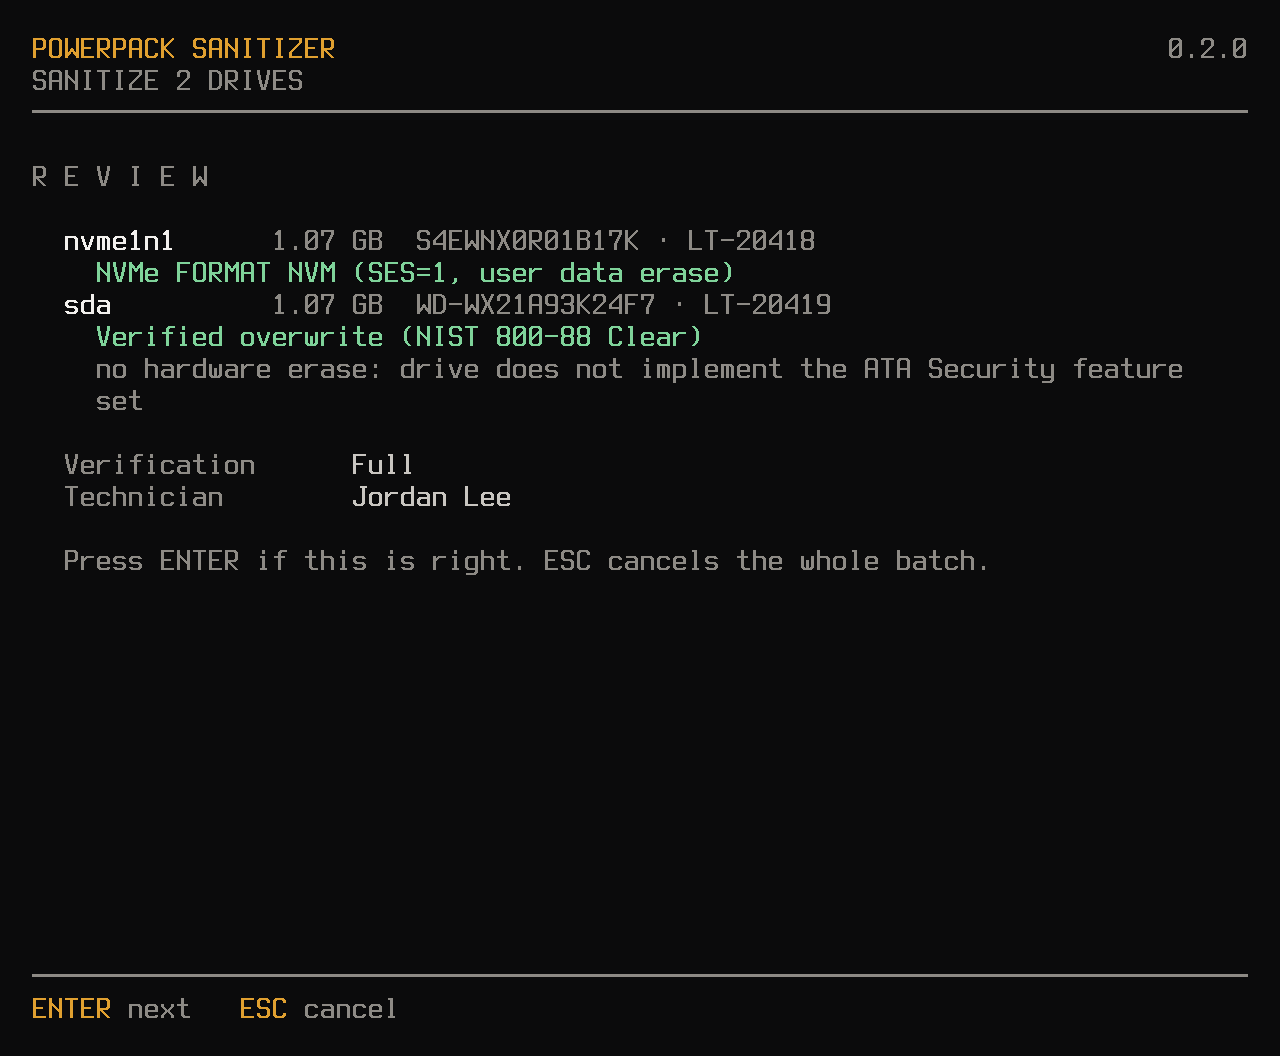
Press S. Enter the technician, organization and work order once, then choose one method and verification for all drives. If a method is not possible on every marked drive, the tool says which and asks you to choose again.
For each drive in turn: enter its asset tag, then the last four characters of its serial. Check the label on that drive; this is what catches a wrongly marked drive.
Review the plan for every drive, press Enter, type DESTROY once, and all drives start.
Two drives marked.Each drive is confirmed by its own serial.The review shows exactly what will run on each drive, and why a drive cannot use a hardware erase.One final DESTROY starts them all.Each drive has its own progress bar.An eight-drive batch. Press Enter on a drive for its details.
If one drive fails (for example it is unplugged), the others carry on. The summary names the failed drive and says it was not sanitized; it gets no certificate.
08Save and check certificatesNEW
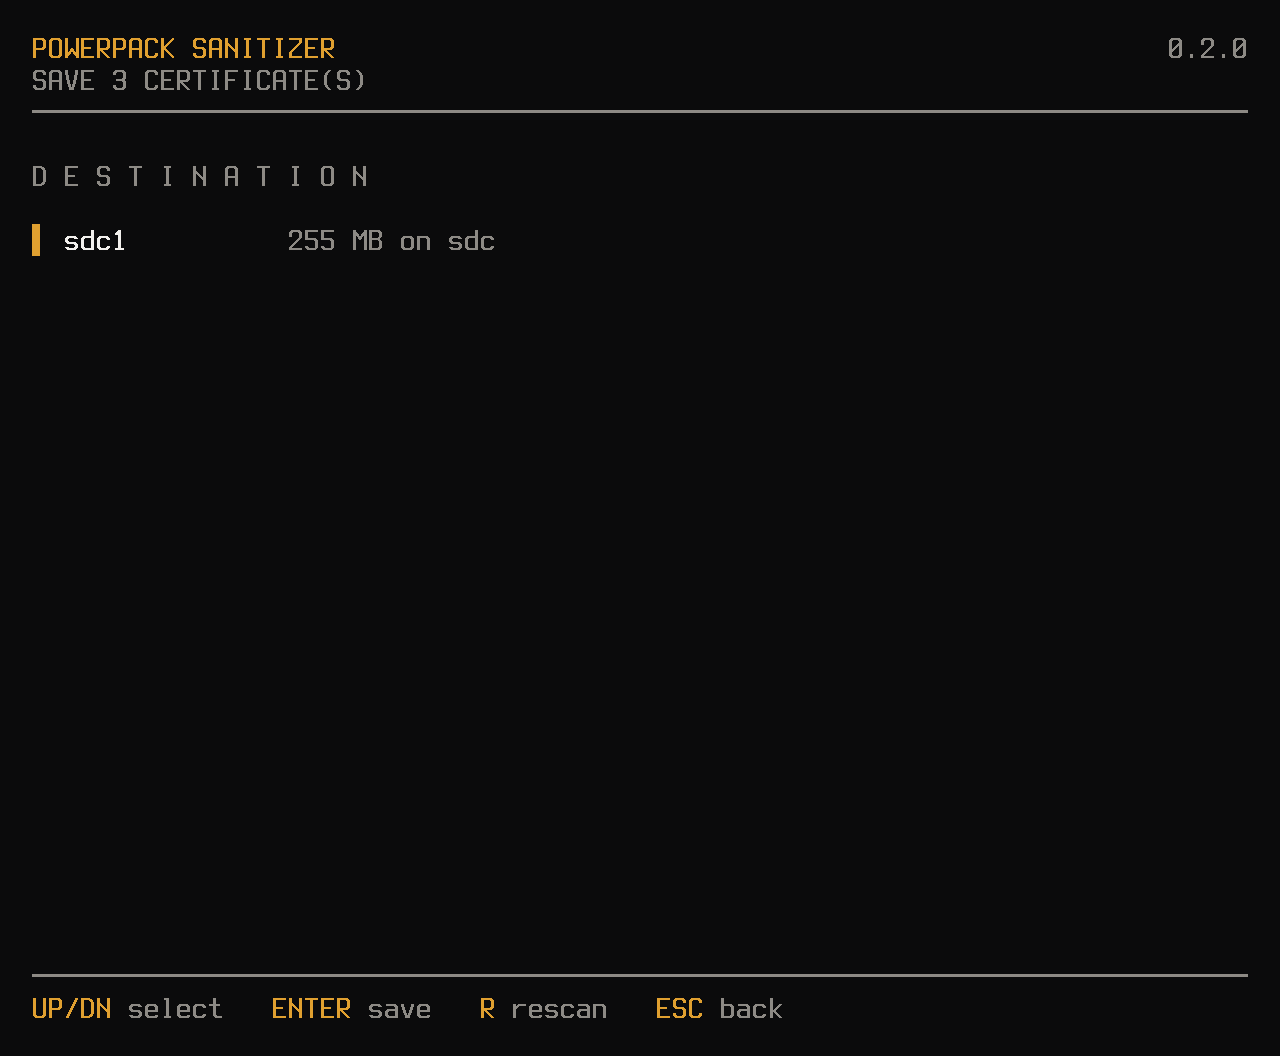
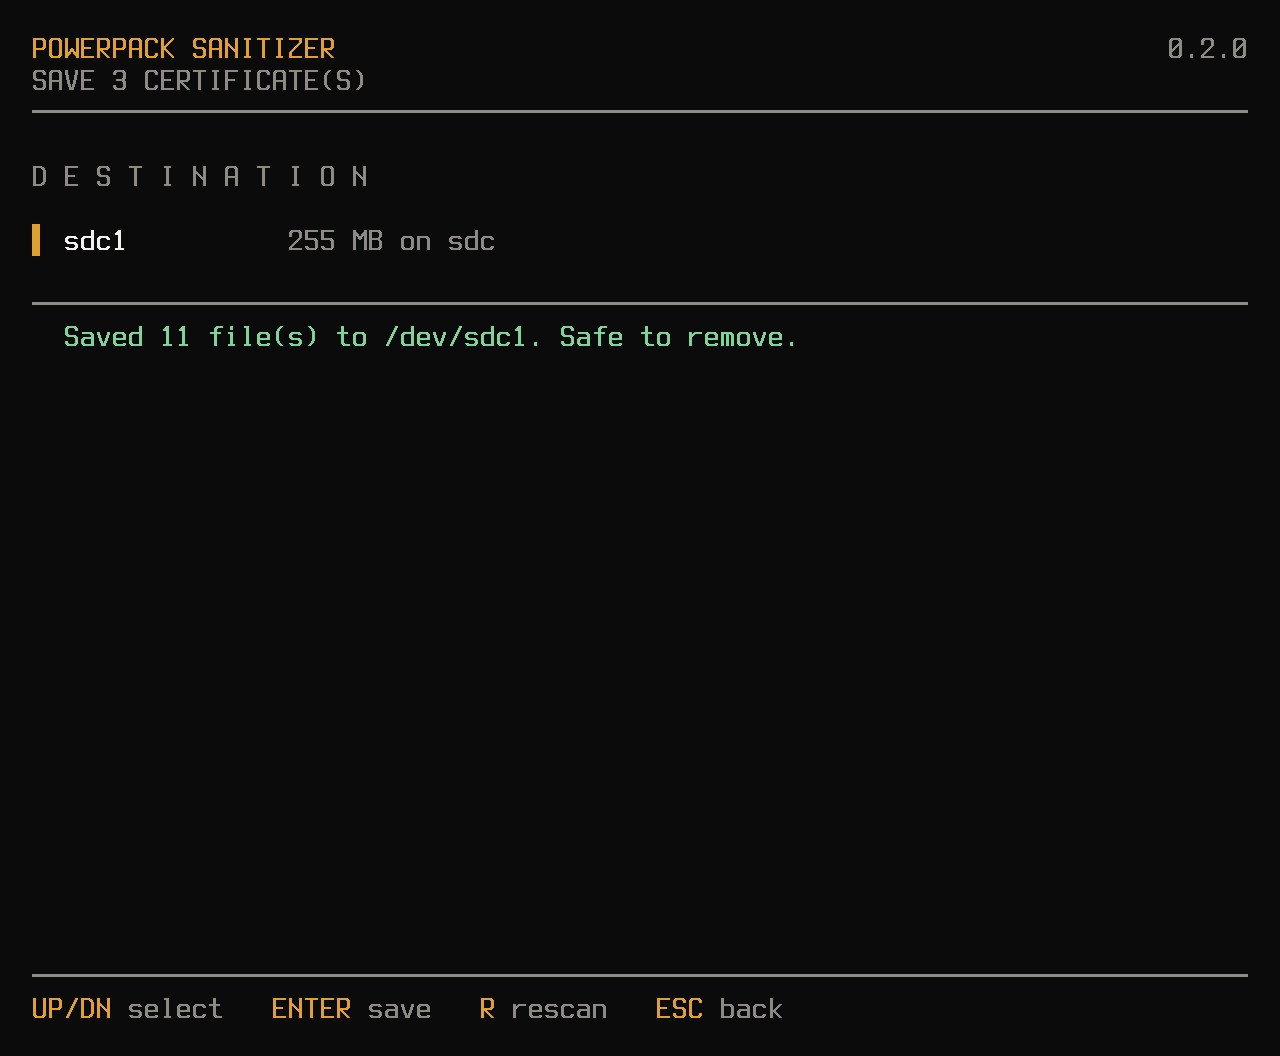
Certificates are held in memory until saved, so save before powering off. Plug in your second USB stick, press C, choose the stick and press Enter.
The stick receives a ppsanitize-certs folder. Inside it, every drive gets its own folder named date, computer service tag, drive serial, for example 2026-09-17_7XK2M13_S3U0NA0M658209 (the service tag is left out if the computer's firmware has none). The screen shows the folder name after saving. Each drive folder holds:
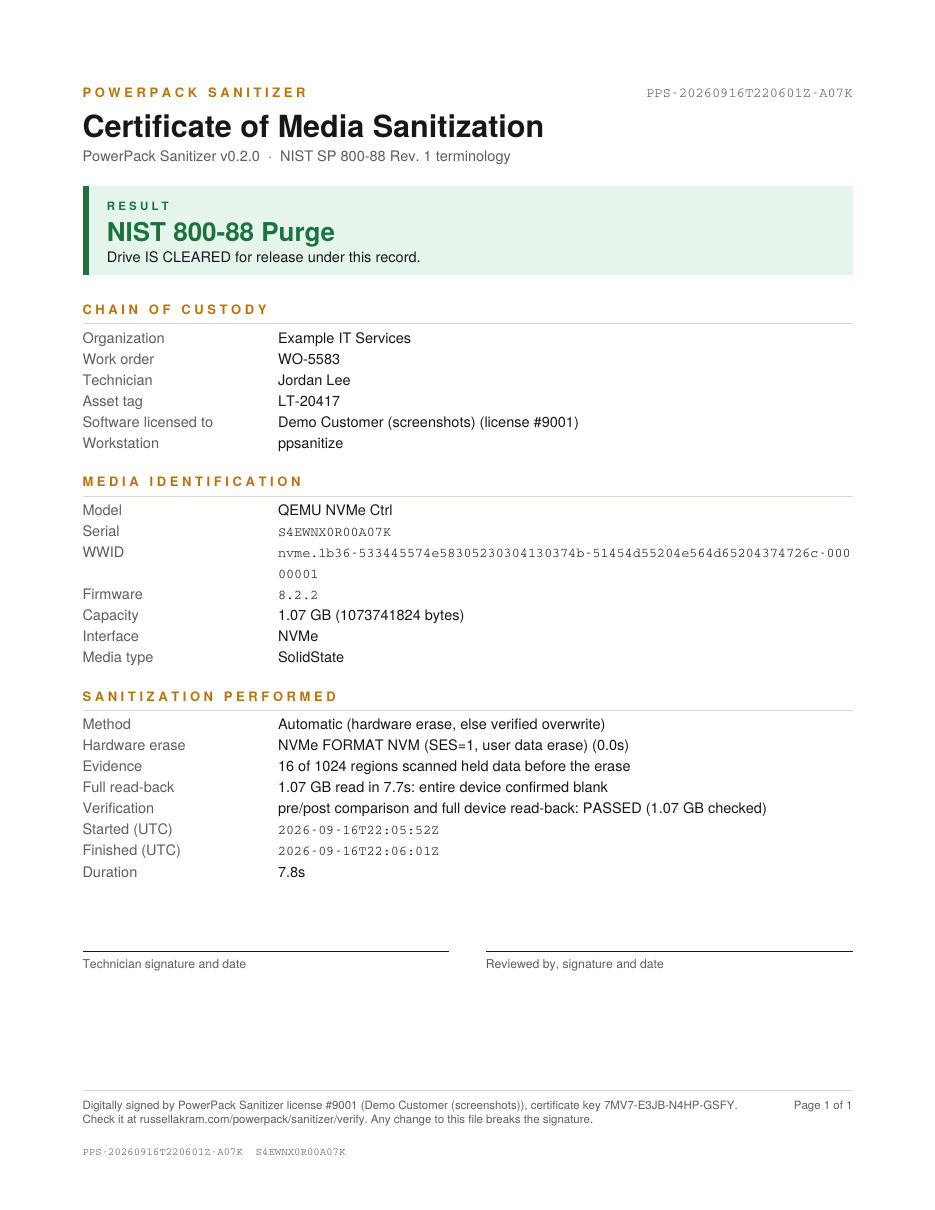
PDF certificate (PPS-….pdf), digitally signed when your license includes the signing line. The machine-readable record is attached inside it.
A plain text certificate (.txt) and a JSON record (.json).
ppsanitize-diagnostics.log: a technical record of what the drives reported, useful for support. It contains no data from the drives and no license keys.
sanitization-log.csv stays at the top of ppsanitize-certs: one row per drive across every session, so a reused stick keeps one running list. Saving the same session twice does not add duplicate rows. Each certificate also names the computer the erase ran on (maker, model and service tag).
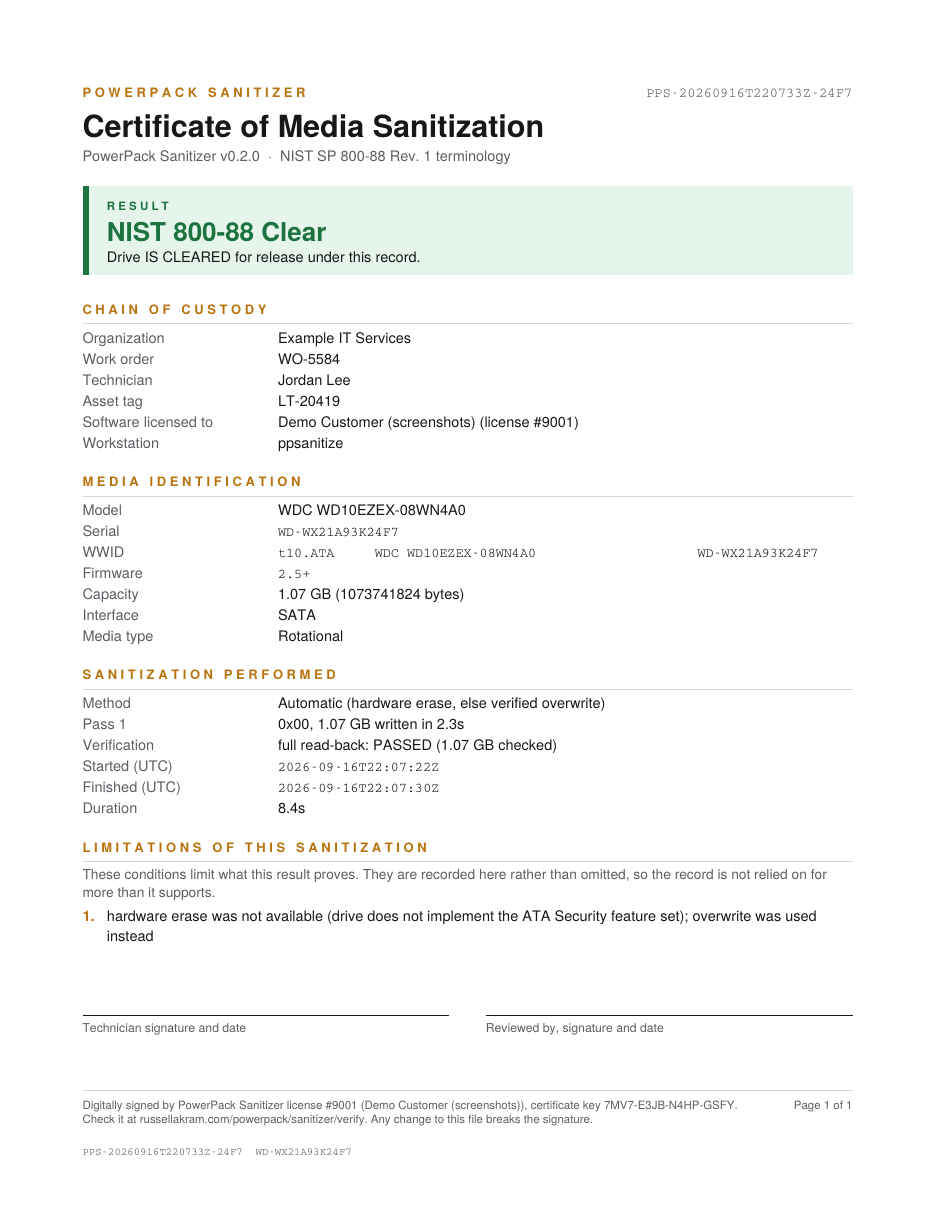
A signed PDF certificate for a hardware erase.An overwrite result lists its limitations on the certificate.
Checking a certificate
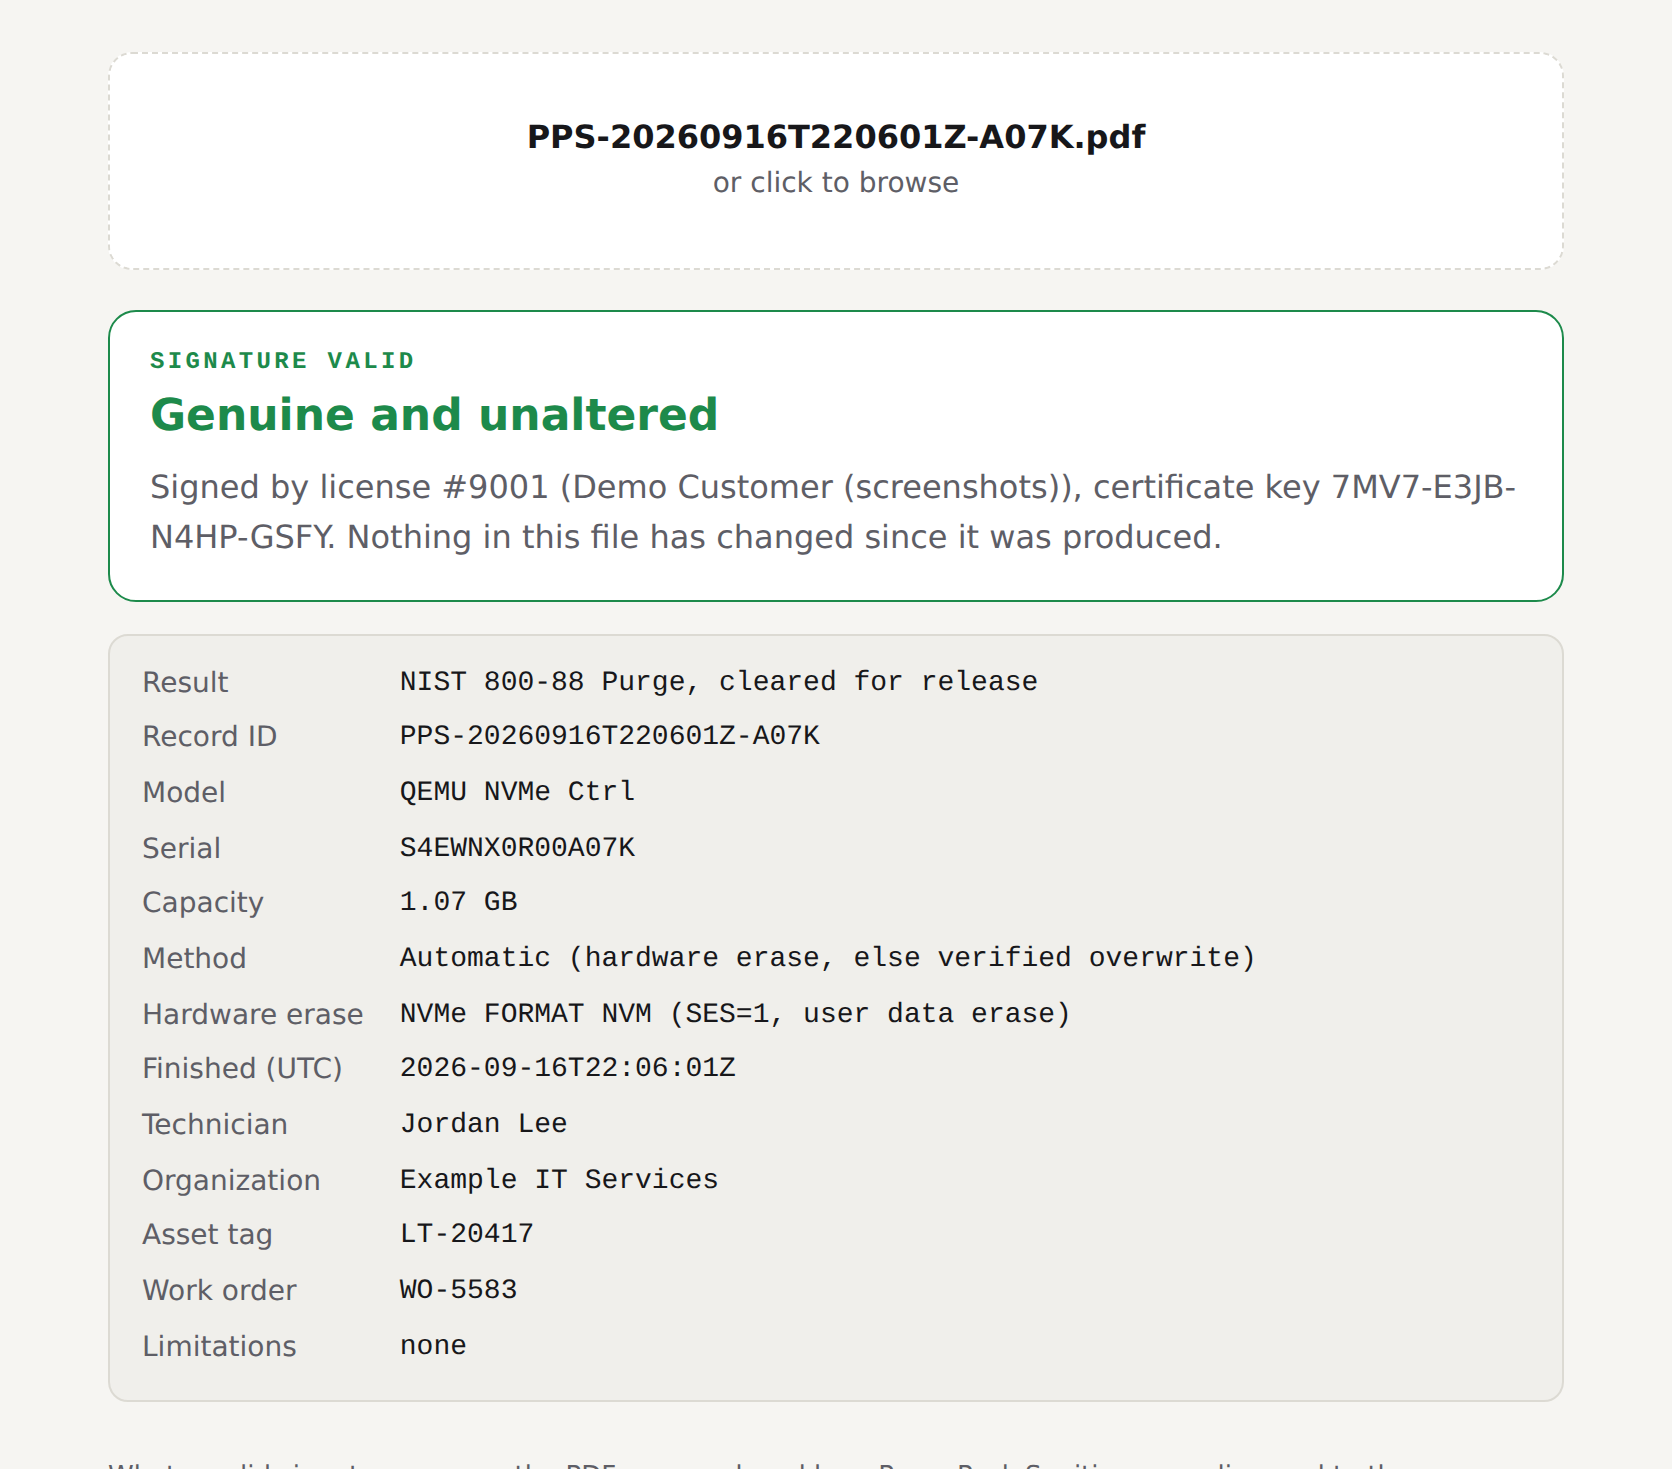
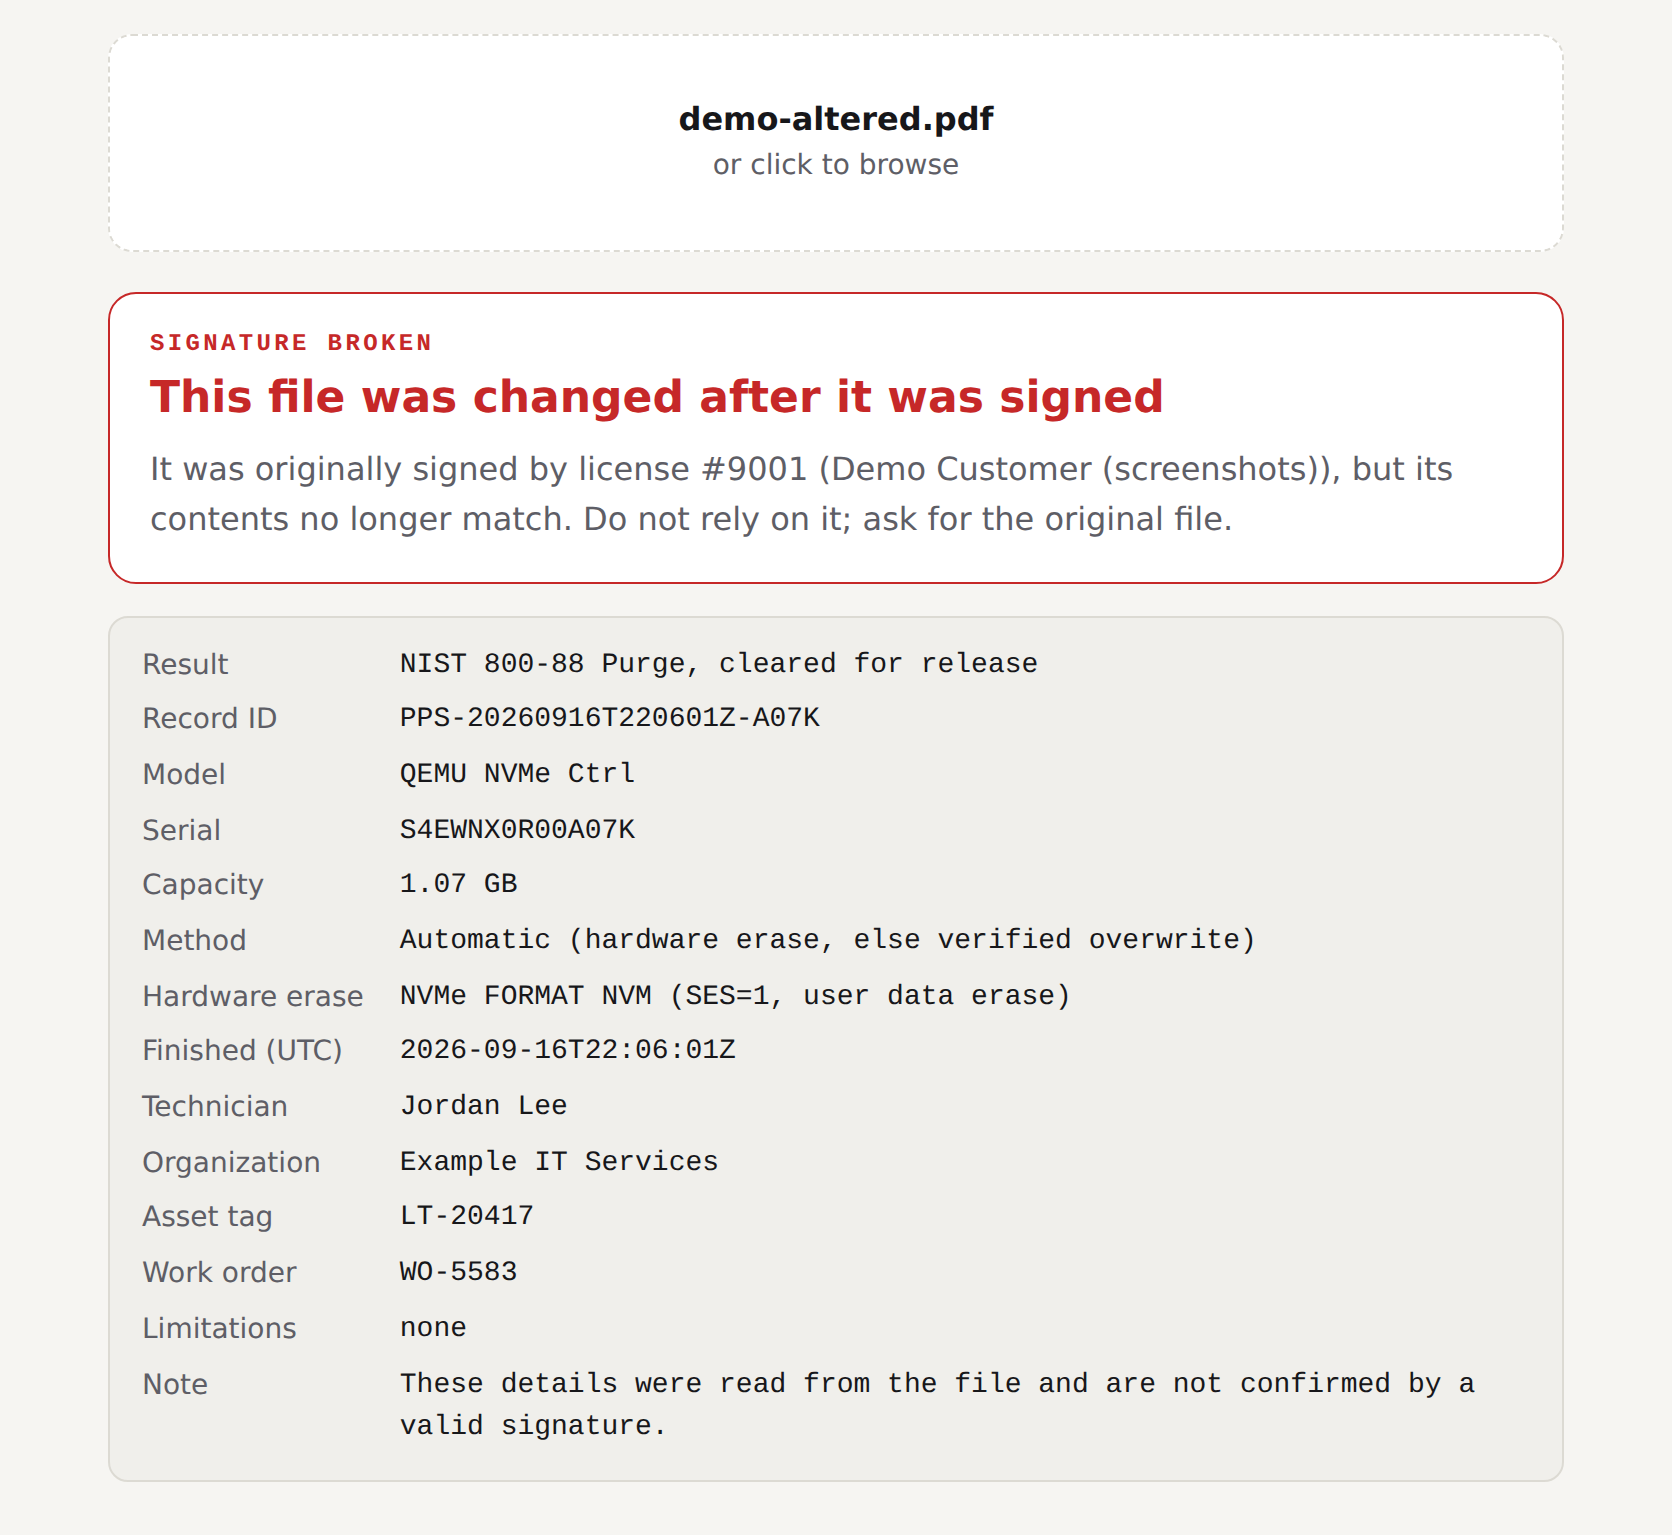
Anyone, such as an auditor, a buyer of the equipment or your own records team, can check a PDF certificate on the Verify page linked from the product page. They drop the PDF in; the page shows whether it is genuine and unaltered, who produced it, and what it records. The file never leaves their computer.
Genuine and unaltered.One character changed after signing.
Keep and share the original PDF. Printing to PDF or re-saving it creates a new, unsigned file. A valid signature proves who produced the certificate and that it has not changed; the result itself is whatever the certificate states.
09SATA drives that are "frozen"NEW
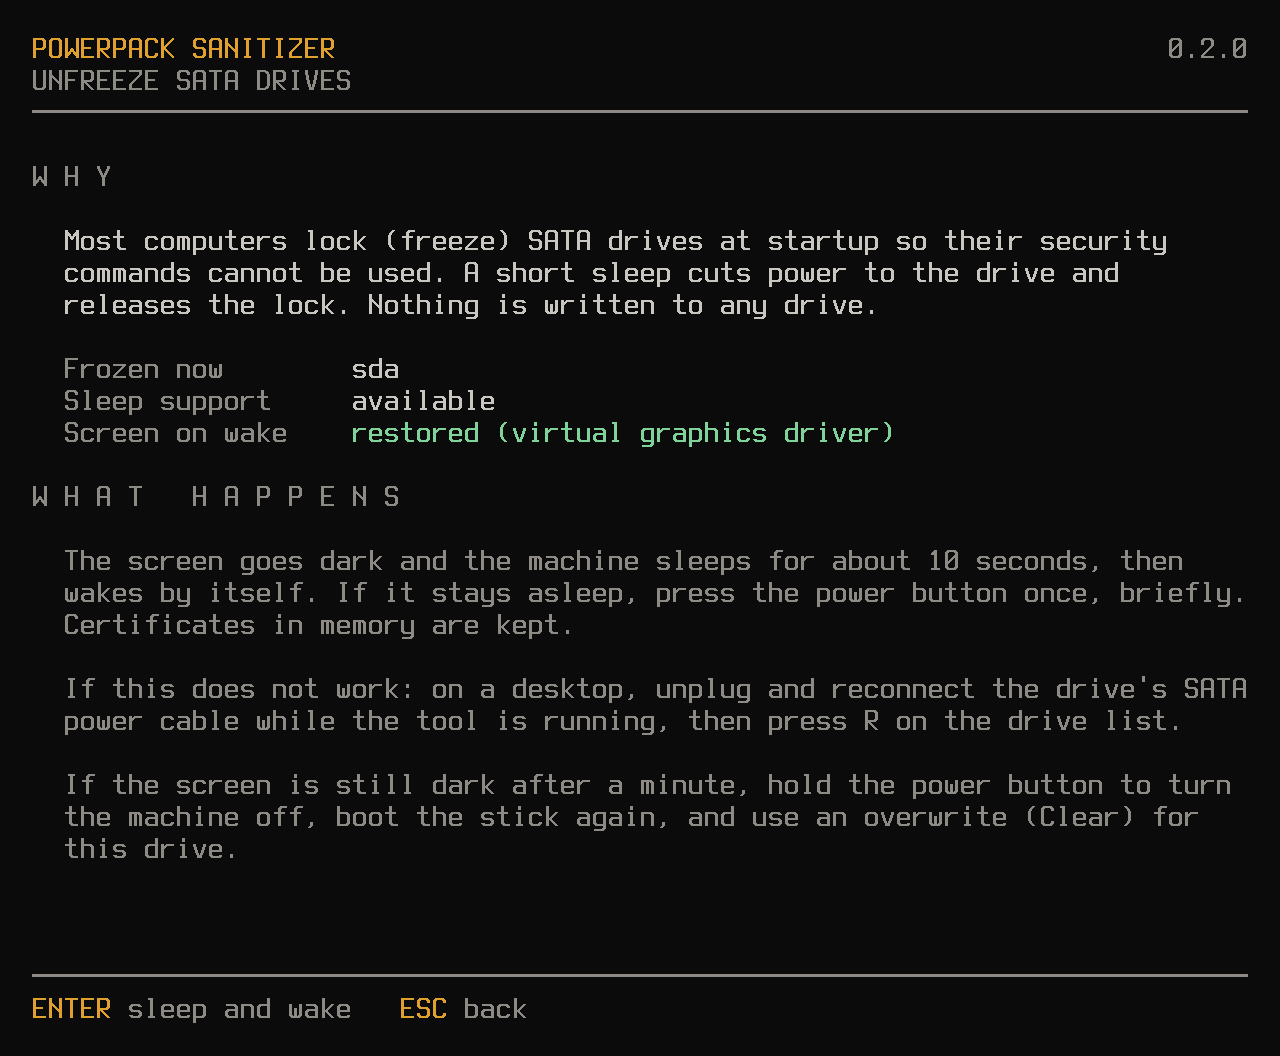
Most computers lock SATA drives at startup so their security commands cannot be used. The drive then shows frozen, U to unfreeze, and only an overwrite (Clear) is possible until the lock is released.
If certificates are already in memory, save them first.
Press U. The screen explains what happens and whether the screen will come back after waking on this computer.
Press Enter. The computer sleeps for about 10 seconds and wakes by itself. If it stays asleep, press the power button once, briefly.
The tool reports which drives were released. They now show purge achievable.
If sleep does not release the lock: on a desktop, unplug and reconnect the drive's SATA power cable while the tool is running, then press R on the drive list. If the screen stays dark for more than a minute after sleeping, hold the power button, boot again and use an overwrite (Clear).
Drives in USB adapters
Many USB-to-SATA adapters block the commands a hardware erase needs. The drive's details screen names the adapter and says so; the drive can still be overwritten (Clear). For a Purge, connect the drive to a SATA port inside a computer.
Hidden areas on a driveNEW
A drive can be set up to report less capacity than it really has, using a Host Protected Area or a Device Configuration Overlay. Data can sit in that hidden part, and an ordinary overwrite of the "whole" drive never touches it. Recovery partitions and some factory tools use this; so does anyone hiding something.
The tool checks every SATA drive for this. The drive's details screen says Hidden area: none reported, the amount hidden, or that the drive did not answer. When capacity is hidden, it is unlocked automatically before the erase, so the whole drive is erased, and the certificate records what was found and that it was removed. If the drive refuses to unlock it (some firmware allows this only once per power cycle, or locks it entirely), the certificate says so plainly and the result drops to Clear instead of Purge.
10Hardware reportNEW
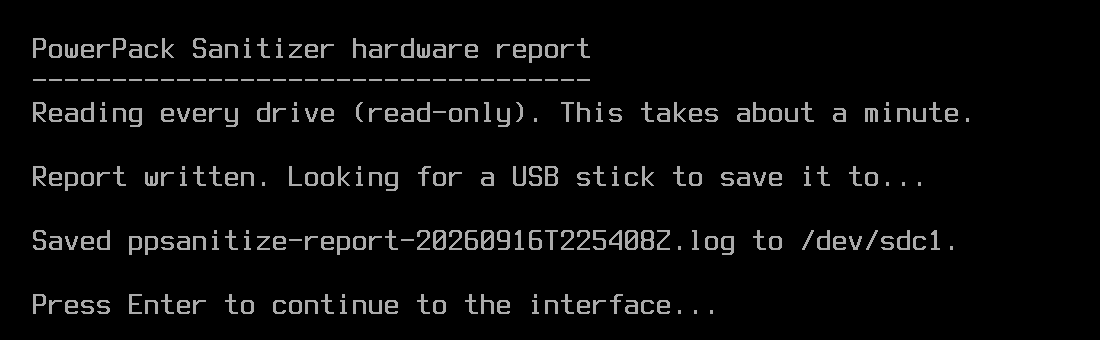
The third boot menu entry, hardware report first, reads every drive without changing anything and saves ppsanitize-report-….log to the first USB stick it can write to (not the boot stick). Then the normal interface opens. Send this file to support when a drive does not behave as expected.
11If you see "Activation required"
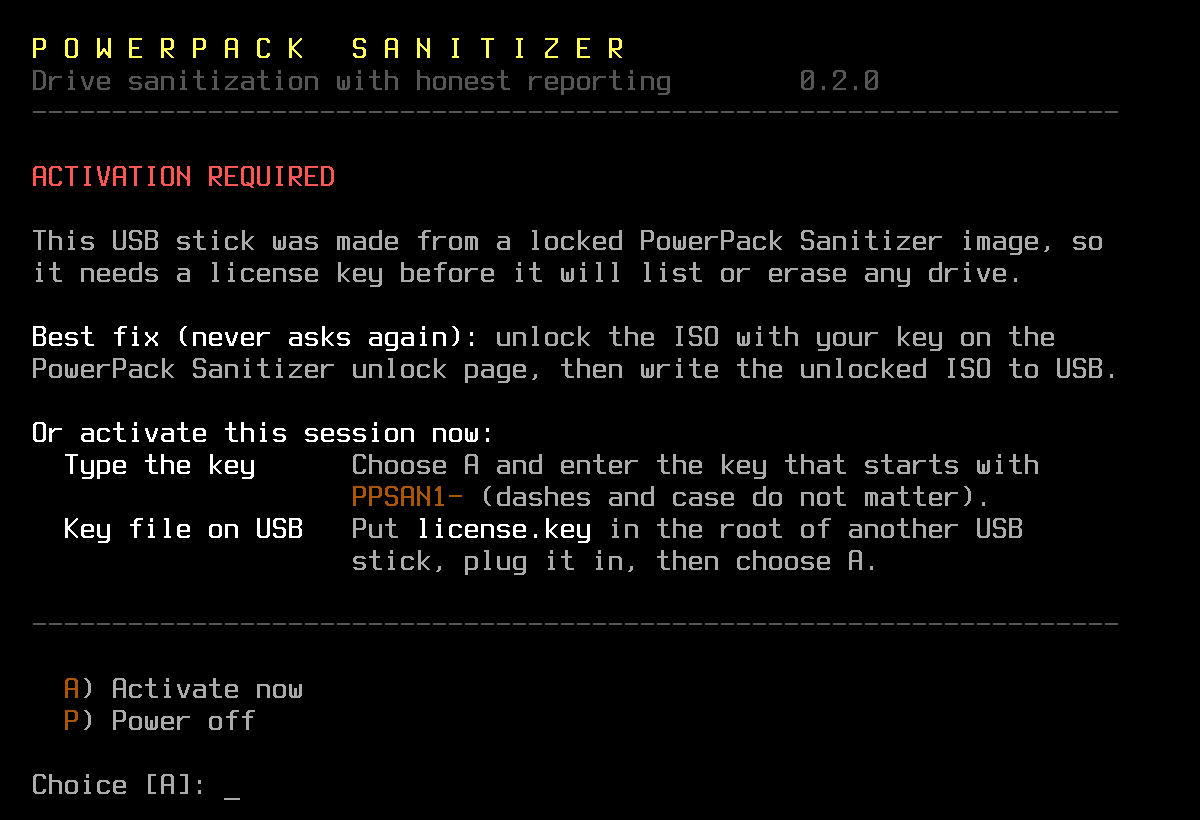
The stick was written from the locked download. The quickest permanent fix is to unlock the ISO (section 03) and rewrite the stick. To keep working right now:
Key file (recommended): copy license.key to the top level of your certificates stick, plug it in, press Enter. Certificates will be signed.
Type it: press Enter, type the PPSAN1- key, press Enter. Certificates will not be signed.
Activation lasts until power off.
12Troubleshooting
Problem
Fix
Computer ignores the stick
Use the one time boot menu, disable Secure Boot, and check the stick was written in DD/image mode.
Drive is not listed
Set SATA mode to AHCI in firmware setup (not RAID, Intel RST or VMD), then reboot.
Drive shows frozen
Press U (section 09).
"USB adapter does not pass ATA commands"
Use a SATA port inside a computer for a Purge, or accept an overwrite (Clear).
Certificate stick not offered
Use a stick formatted FAT32 or exFAT with a normal partition table (the Windows and macOS default).
Certificates are not signed
The stick was unlocked or activated with the key line only. Unlock again pasting the whole license.key.
Screen blank or garbled
Choose text mode, for troubleshooting in the boot menu.
Wrong date on certificates
Certificates use the computer's clock. Fix the date in firmware setup.
13License basics
Single technician: one named person, any number of computers and drives.
Site: any number of technicians at one physical location.
Evaluation: full features, for a limited time.
Licenses are checked offline. No internet connection, account or activation server is involved, and nothing about your drives is ever sent anywhere.
Certificates are signed with a key tied to your license. The license key itself is never written into a certificate.